I have this simple Hanami API application allowing me to list some draft articles and published ones, under separate endpoints. However, none of those endpoints is authorized, which means that anybody can access all my resources at any point in time!
I'd like to have all my requests authorized by default, according to the secure by default principle, and for that, I'll want to go with the JSON Web Token authorization.
In this episode of Hanami Mastery, I'll show you how to implement the JWT authorization mechanism and a simple access check to verify the rights to access the given resource.
Authorization levels
In web API there are usually at least two levels of authorization. First is the application level, when we register the client application in our system and give it particular access, such as user session management or a registration.
Then the other level of accessibility is when a user gets logged in and tries to access available resources.
A nice example is a GitHub OAuth applications setup when you can register an application that can connect with GitHub API, and only when you use it to log in the user, you get access to more resources like your own private repositories for example.
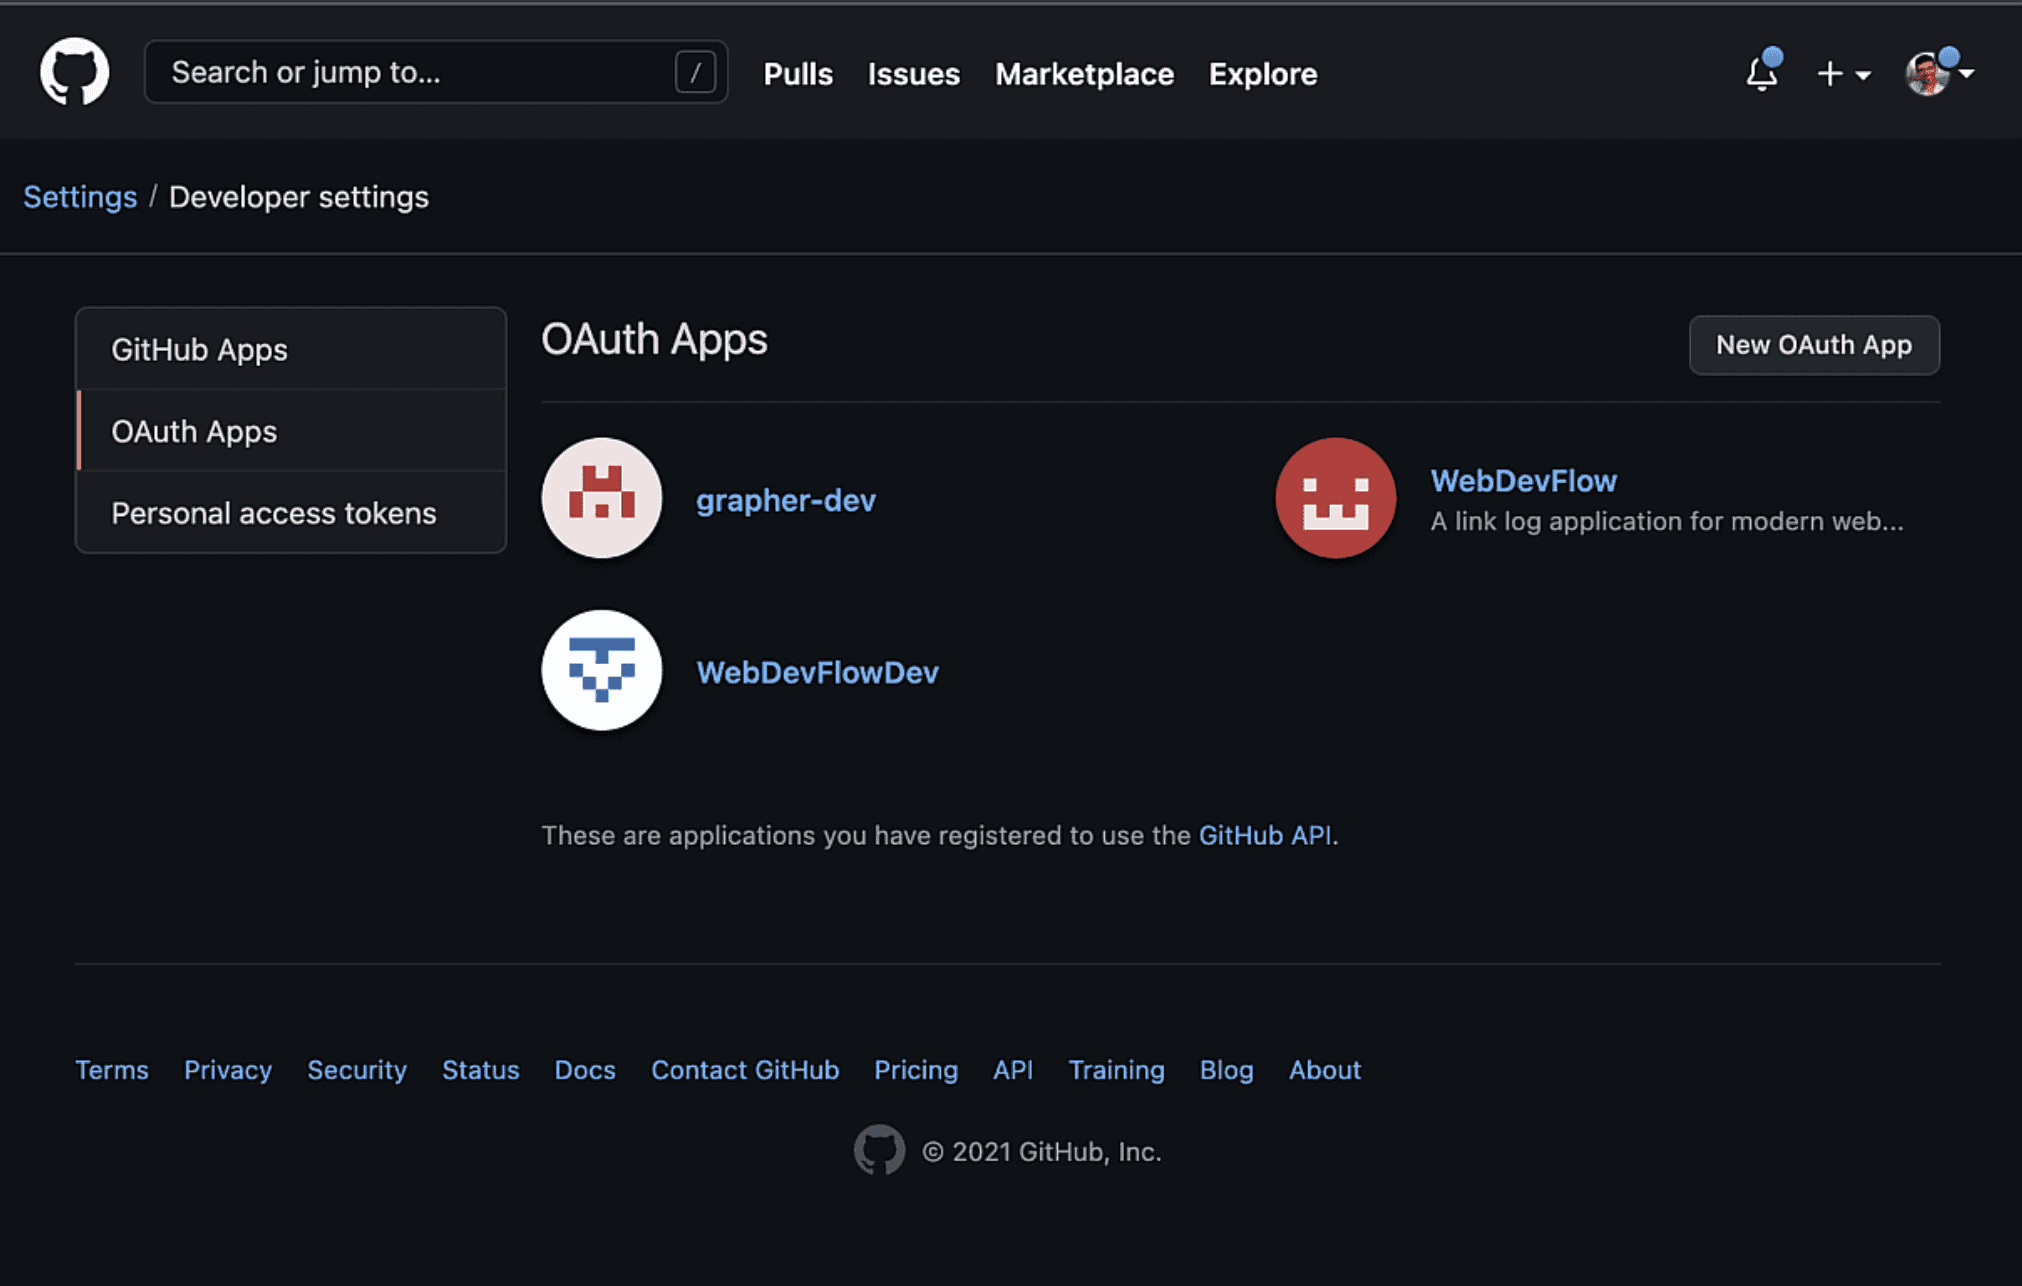 Oauth application registration in Github
The reason for that is simple. Skipping authorization checks for endpoints, like registering users is a serious security issue in any system and can lead to various vulnerabilities for hacker attacks.
Today I want to show you just the JWT authorization, and for the sake of this example I assume that you have the authentication mechanism implemented already. If that's not the case, I will cover authentication in one of my soon-to-be-released episodes. You can subscribe to my channel to be sure you won't miss it and support me to speed things up!
JayDoubleuTee
To implement authorization for my Hanami application I'll use the jay_doubleu_tee gem, which is a tiny wrapper on top of the standard JWT implementation for ruby, to simplify the integration with web apps, and reduce the overhead required to add it to any - and I mean: ANY Rack-based application.
In the README of this gem, you can even get a plain ruby script with only a few lines of code, that just works!
Even though currently, it came with only the minor version so far, it's already useful and stable.
# config.ru

require "jay_doubleu_tee"

class App
  include JayDoubleuTee::Auth

  def call(env)
    status, body = [200, [{ message: "Hello, World!", auth: auth.value! }]]

    [status, headers, body]
  end

  private

  def headers
    { 'Content-Type' => 'application/json' }
  end
end

JayDoubleuTee.configure do |config|
  config.algorithm = 'RS256'
  config.secret = ENV['JAY_DOUBLEU_TEE_PUBLIC_KEY']
end

use JayDoubleuTee::Authorization

run App.new
puma config.ru
It's done by keeping the gem rack-compatible which allows for such flexibility of implementing it in any application you want.
I wrote it because I wanted to play more with dry-effects gem which I showcased in the previous episode but also because there was no robust JWT authorization mechanism available for rack applications yet. JayDoubleuTee gem uses dry-effects under the hood to manage non-local state, together with dry-configurable for an easy configuration (see episode #5).
In this episode, I'll show a JWT authorization example by using a Hanami 2.0 sample application, but if you're using Rails, Sinatra, Roda, or even a plain Ruby, the integration is almost identical.
Short story about the naming
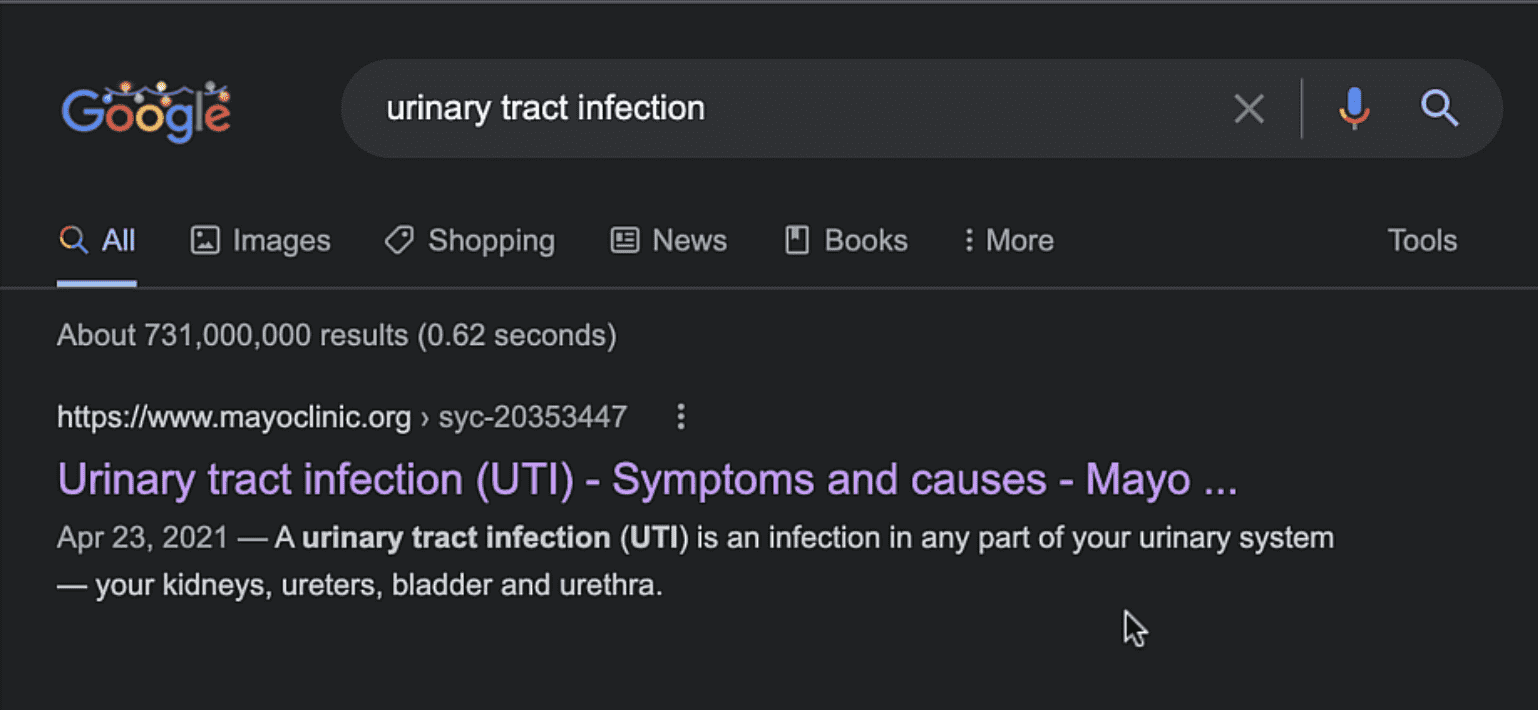
This gem is created by me and was originally named: jay_double_uti
or rather UTaj as I quickly learned - and the name was a result of me trying to have the fun of the English language, but it appears that the language had the fun of myself instead.
I just wanted to write what I hear when I read JWT word, BUT I forgot how the I letter is usually read in English.
Then it appears, that UTI is an actual acronym, and quite a popular one, standing for Urinary Tract Infection!
 ]
]
I would never guess that on my own, and if you combine this with the fact that the J letter, doesn't necessarily need to refer to a letter, you may come up with the Idea that gems' name refers to: "Jay's double Urinary Tract Infection".
I can think of people having nicknames or even names from the Jay letter, so I renamed the gem while keeping this note for future myslelf as a reference to be more careful when naming things
 Agent J from MIB
Apologize to all Jay's in the world and
Big thanks to Tim Riley for pointing out this English phenomenon - This is the pure essence of benefits from being a blogger and Open Source contributor. Just by publishing any of my work I get so much great feedback from all of you that I can improve at the pace I'd never be able to if I would keep my thoughts for myself!
If you consider starting blogging or recording videos, I highly recommend it!
So thanks, and as always, if You'll ever find anything where I could improve, let me know, I love tweaking up anything I tackle.
Anyway, back to the topic.
Using JWT with Hanami app
Now let me show you how to use this gem in the Rack-compatible ruby applications, using Hanami app as an example.
Generate the token for testing
First I need to add the jay_doubleu_tee gem to my Gemfile. Then run the bundle to install new dependencies and we're ready to configure our authorization stuff.
# Gemfile

gem 'jay_doubleu_tee'
Learn safe versioning
If you're interested in ideas how to manage gem versions in bigger projects, check out HME034 introducing pessimize gem. It's just one way to never accidentially update gem unintentionally.
To authorize the endpoint I need a token. As jay_doubleu_tee uses the RSA algorithm by default, I'll generate the private and public key pair and the token itself just for testing purposes.
For that I'll use the script copied from the README, however, with a little adjustment to the payload, to add a sample scope that will be useful later.
# hanami console

equire 'jwt'
payload = {
  data: { user_id: "de804507-5d03-4493-a038-d62f499b8a96" }, scopes: ""
}
private_key = OpenSSL::PKey::RSA.generate 2048
secret = private_key.public_key.to_s
token = JWT.encode payload, private_key, 'RS256'
To generate the token I need a private key, but to verify it later in the authorization, I only care about the public key. This may be useful when you have a separate service to generate your tokens and authenticate users, while the rest of the systems only need to check if the tokens incoming to the server are valid or not.
I'll copy my public_key to the environment variable and save it in the .env file.
JWT_PUBLIC_KEY= "-----BEGIN PUBLIC KEY-----\nMIIBIjANBgkqhkiG9w0BAQEFAAOCAQ8AMIIBCgKCAQEAqL34DvkrEre8UQLTjXLK\nffrGZzyRtpyCA8LjESVoTpq1PLNW1MeXgrVlsQaz7/VI+CgCJafAtrrlFU/DGxdM\nHIJAdBxFsQQLiCjpBmDjDTghWdWWIHgjCPcnZxo6VBYEhnSCKhd69ZR0ytdbG3w3\nOFmzPkX2Iy1lGIkvvjkZWT05oPLjUysgYqfK+M6o6ujwHAz9UNCvBDQh8gGWlgVp\nVz1Kny7Y0ZHMCTgt3PbTraMTZS3bE39urYOKD1AId+q4ZyDGoA7QOVI3ENmilQYd\njoPk70FherKWOt7TsZvK8zsuacRZ/oGOOwV/++9aBvKxItg+CKNZqUbq/4uvJys5\nFQIDAQAB\n-----END PUBLIC KEY-----\n"
The generated access token I will save in the postman application, in my request example for later use.
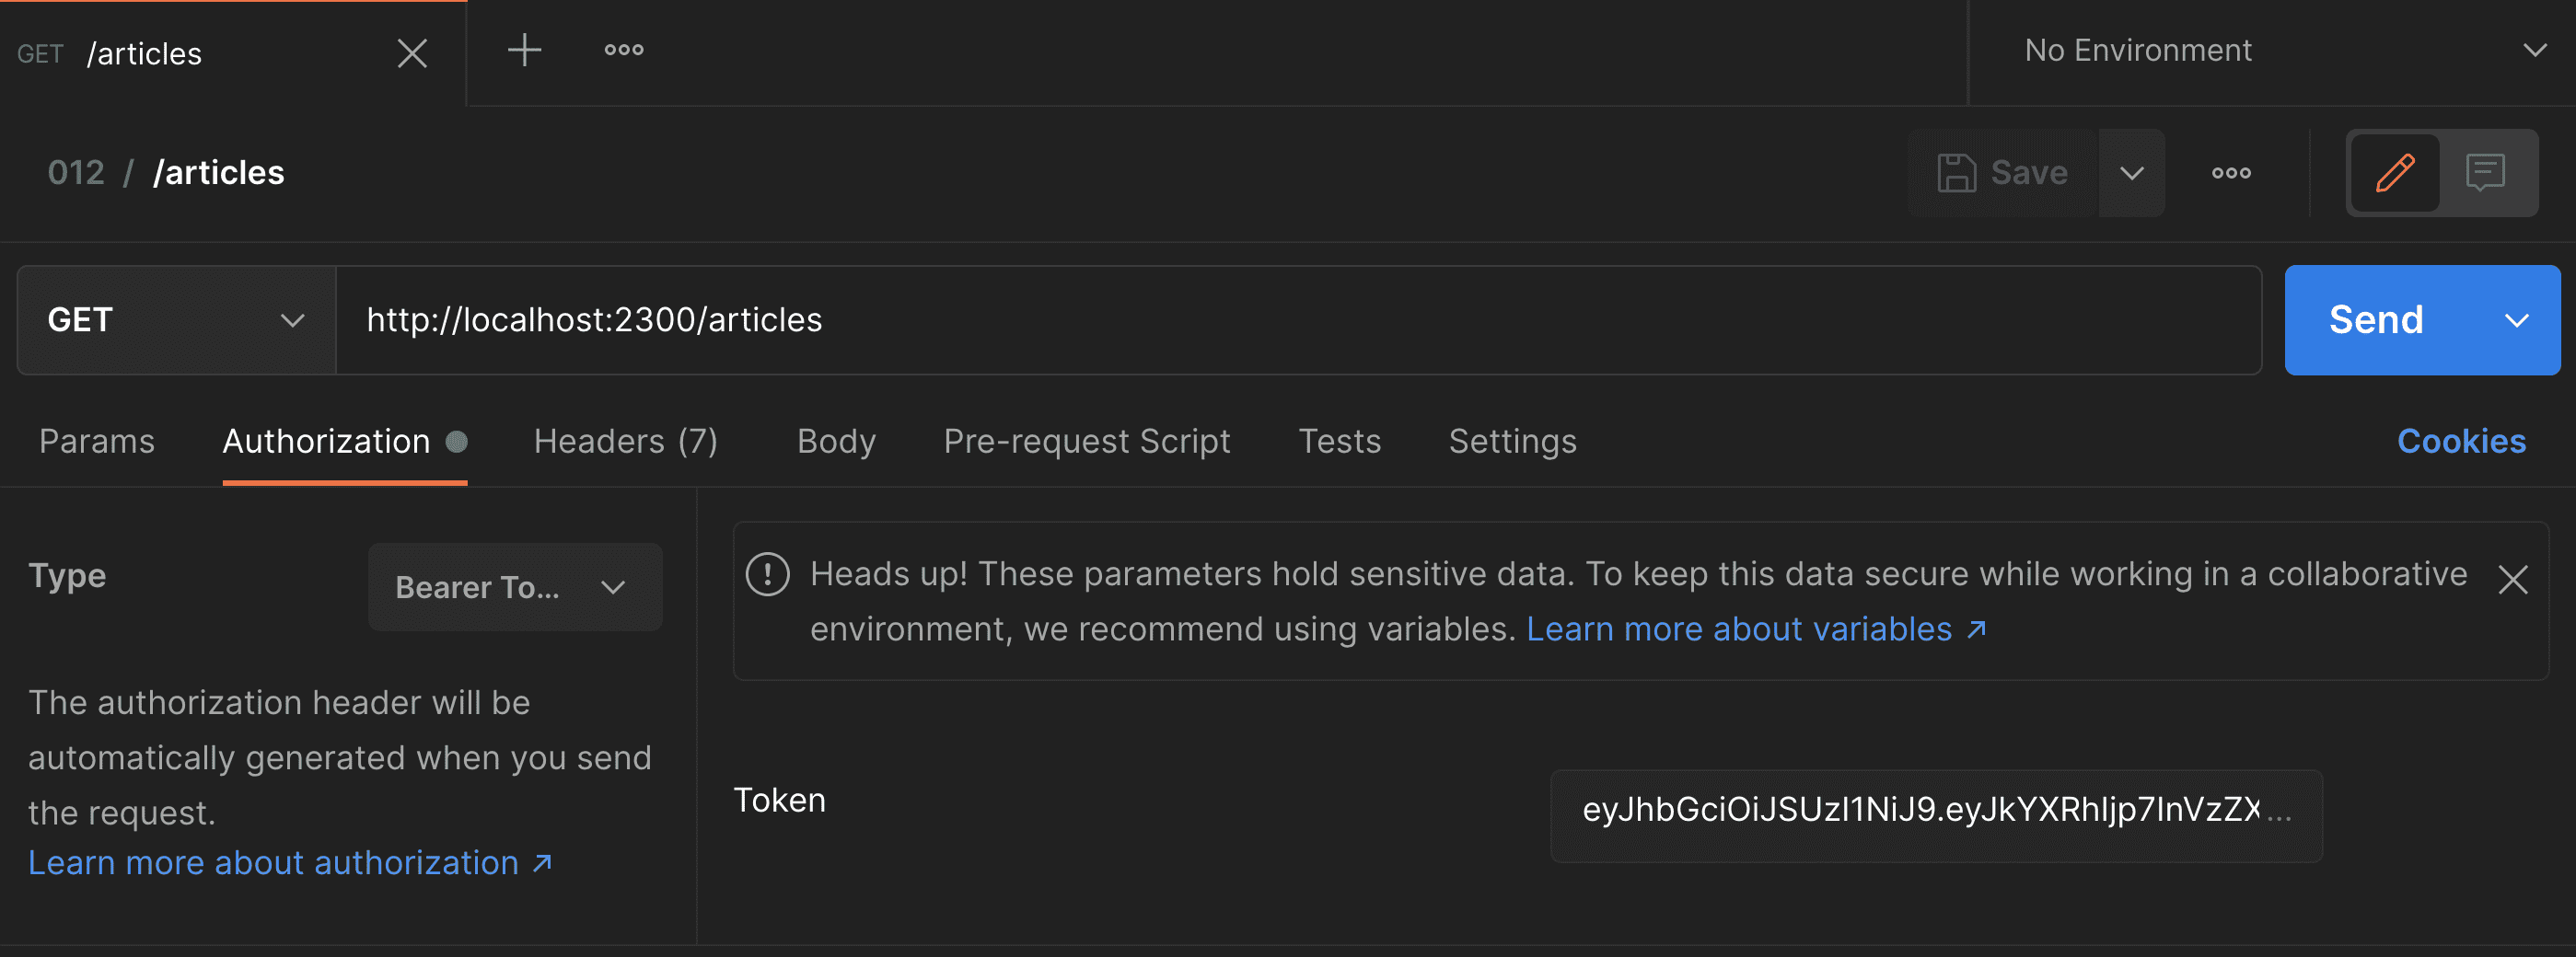 Setting Bearer token in postman application
Implement authorization
I do have the public key set in the environment variable now, however it is not yet accessible in my Hanami application settings. In Hanami, application configuration settings are read from environment variables automatically, but each setting needs to be explicitly defined, with the expected type set.
This prevents unwanted environment variables to be accidentally loaded to the application, increases security, and minimizes the issues related to undefined values being set. I love this feature, as there is no way to even run the application with invalid config, reducing the time to debug issues related to it.
Here in the settings.rb file, I'm going to ad a new setting, named the same as my variable name, to be read automatically, jwt_public_key. I'll set this as a required value of a type of String.
# config/settings.rb

module Sandbox
  class Settings < Hanami::Application::Settings
    #...

    # JWT
    setting :jwt_public_key, constructor: Types::String
  end
end
From now on, if there is a missing public key in any environment, my application will crash on boot reporting the invalid nil value in the environment variable.
Now let me launch the console and check if the setting value is properly loaded and is accessible in the container. It is! So now I can configure the jay_doubleu_tee gem in my project.
First let me add a new bootable component, to be registered on application start. In Rails environment, you'd look for an initializer.
I'll add here a new file, named jay_doubleu_tee, and inside I just register a new bootable component, named: jay_doubleu_tee.
Inside, I'll require the jay_doubleu_tee gem on init, and on the startup, I'll configure the gem to read my public key.
I don't need to set the algorithm here, because JayDoubleuTee uses RSA Signature by default and this is the one I use in this showcase. However, I do like to have explicitly set such things in the app for easier reference in the future when reading the code during reviews and applying changes.
Then let me configure the secret key to be read from just set container settings.
# config/boot/jay_doubleu_tee.rb

Hanami.application.register_bootable :jay_doubleu_tee do |container|
  init do
    require 'jay_doubleu_tee'
  end

  start do
    JayDoubleuTee.configure do |config|
      config.algorithm = 'RS256'
      config.secret = container[:settings].jwt_public_key
    end
  end
end
Having the gem installed and configured, I only need to use it. For that, I open the config.ru file and add my JayDoubleuTee::Authorization middleware to the application stack.
Now let me start the server...
And when I'll open the postman now, I'll get an unauthorized error response for my drafts!
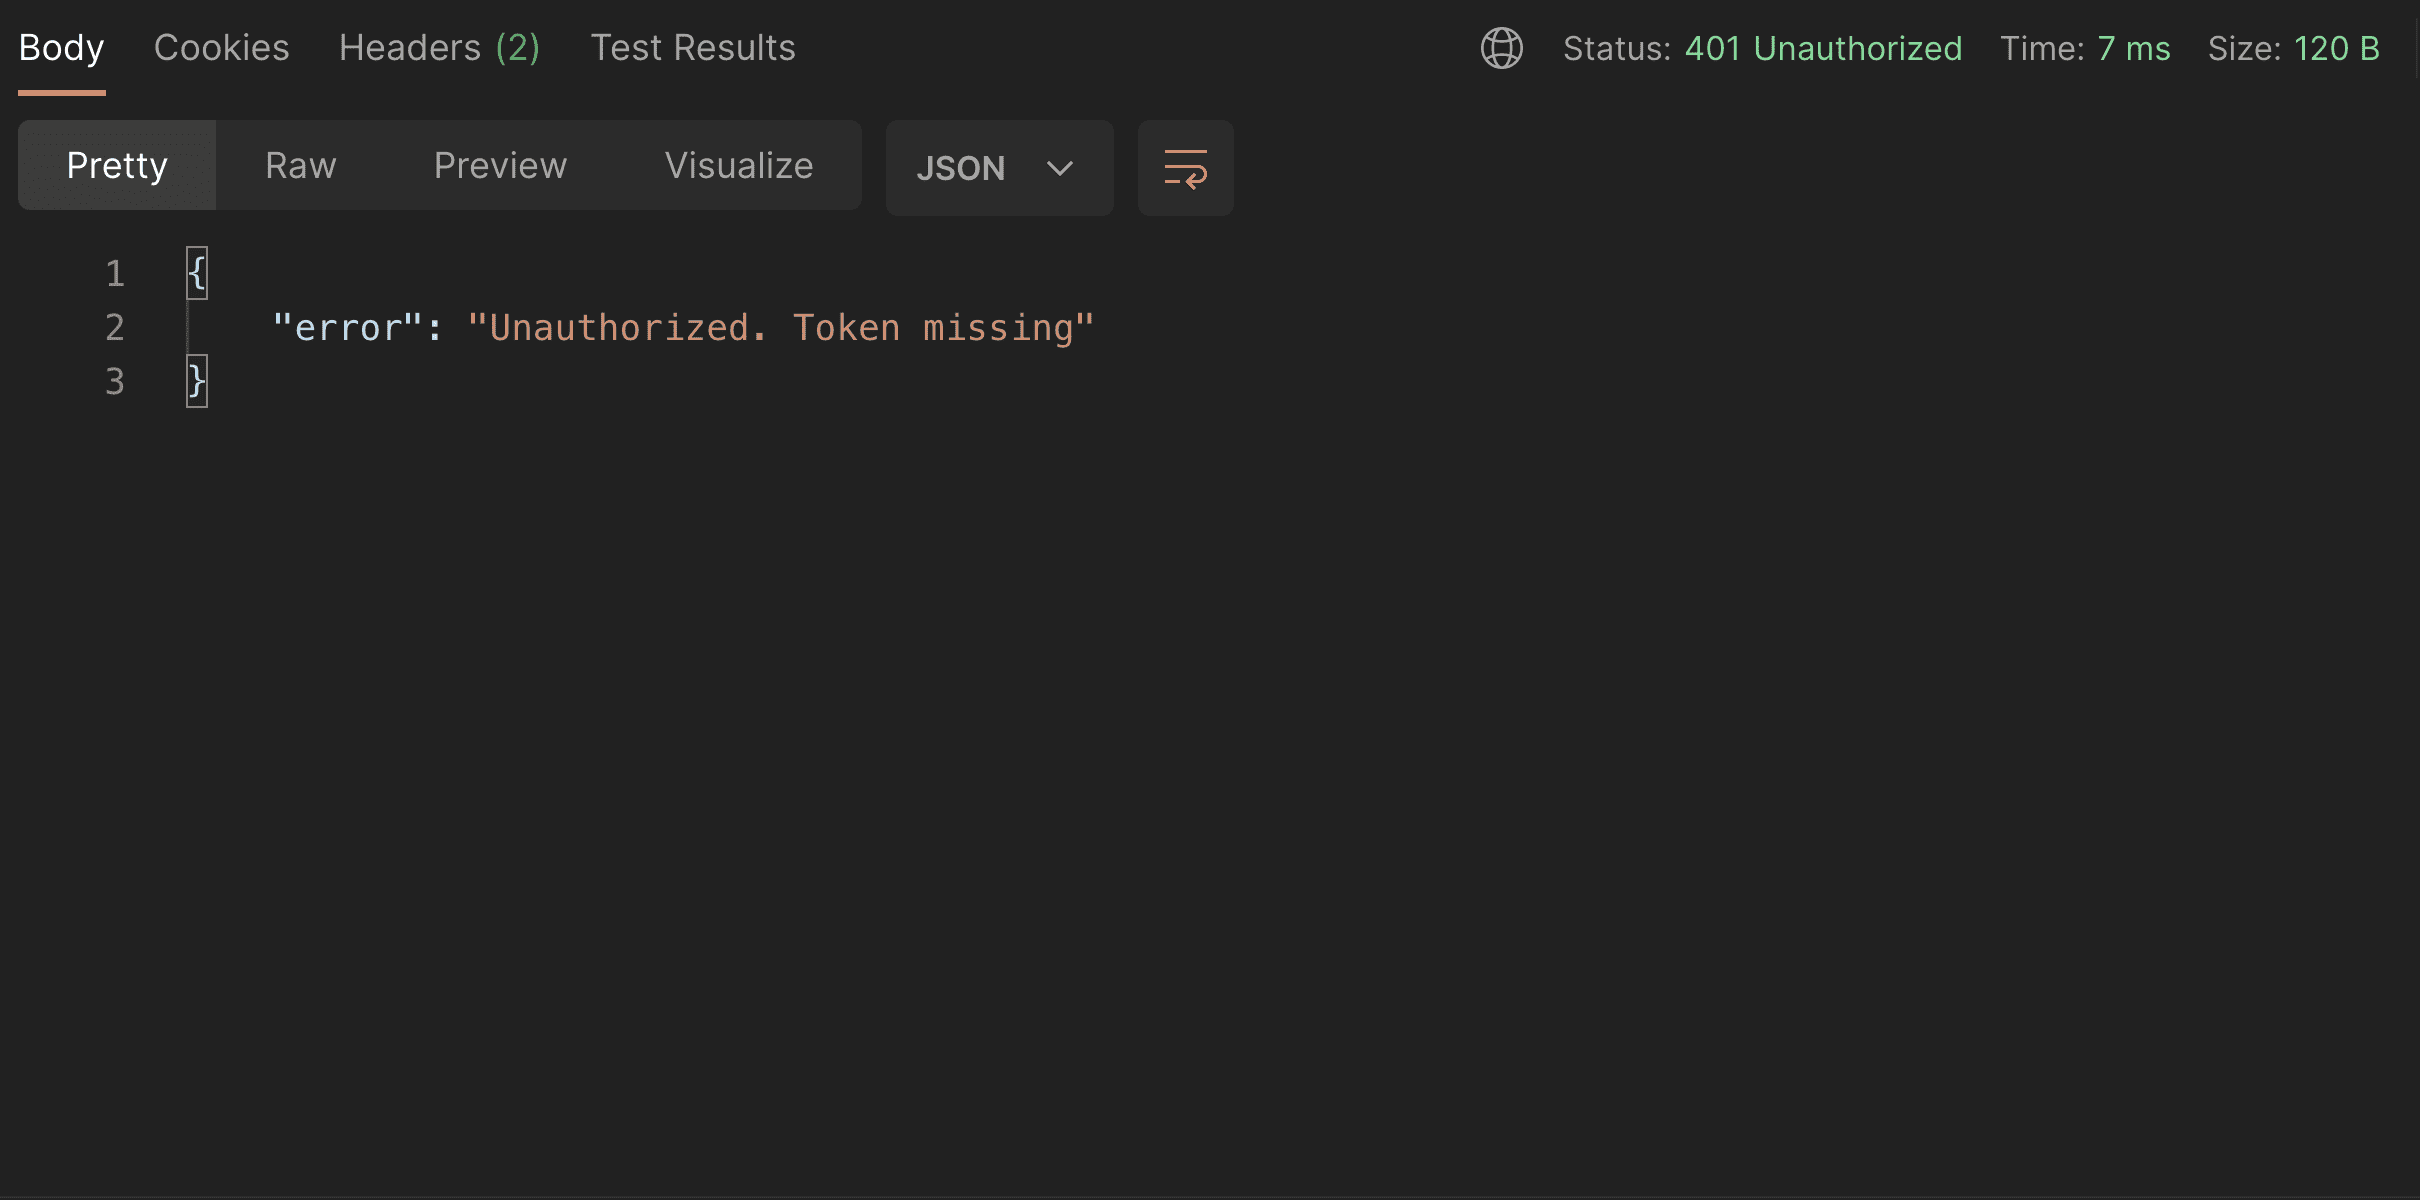 Unauthorized response example
This is neat.
If I'll set the authorization header in my request, setting the token to the just generated string, My app will return the actual response!
Access the payload
That is awesome, but what if I'd like to check additional access criteria in my article details action, to allow the client to list my draft articles, only if the token contains a certain scope in the payload or the current user id is present in the token payload?
For that, I'd need to have access to the payload stored in the token.
With JayDoubleuTee it's extremely easy. In your action just include the JayDoubleuTee::Auth module, and from now on I have the access to the auth object, which is a decoded payload extracted from the request token!
If I'll render it here, you'll see exactly the payload I used to generate the token earlier.
# slices/main/actions/articles/published.rb

module Main
  module Actions
    module Articles
      class Published < Main::Action
        include Deps[
          repo: 'persistence.repositories.articles'
        ]

        include JayDoubleuTee::Auth

        def handle(req, res)
          res.headers['Content-Type'] = 'application/json'
          res.body = auth.value!
        end
      end
    end
  end
end
Having that I can have very fine-grained control over the access verification for any of my actions. I can now verify if the user has access to the requested resource by adding a check if the scopes of my decoded token include the public.articles one.
Then I'll render the valid JSON response only for this case, otherwise returning an error to the browser.
# slices/main/actions/articles/published.rb

module Main
  module Actions
    module Articles
      class Published < Main::Action
        include Deps[
          repo: 'persistence.repositories.articles'
        ]

        include JayDoubleuTee::Auth

        def handle(req, res)
          res.headers['Content-Type'] = 'application/json'
          auth_data = auth.value!

          if auth_data['scopes'].include?('public.read')
            res.body = Serializers::Article.new(repo.published).serialize
          else
            res.body = { error: 'Forbidden request' }
            res.status = 403
          end
        end
      end
    end
  end
end
Now when I visit the Postman, I get the forbidden error response, due to the invalid scope being set. By changing it to public.read and refreshing the request, I will see the correct data now.
Write Authorizer.
Having that I can do any access check I want. However, what I did here is adding an authorization logic to my action, which is not great.
What I really like to do instead is to write separate, atomic authorizers for every action in Hanami (or Rails), and extract common code to shareable places when I'll start seeing repetitions and patterns.
For the sake of this example, let's just create a guest authorizer in the lib/authorizers folder of my main slice.
Then we need to define it.
It'll contain only one method, call, that accepts an auth argument, followed by anything. This is because authorizers usually need to check the actual object to verify the access, which I call subject. In this case, however, I only use the auth scopes so can keep the other arguments undefined.
Then inside I paste the access check logic for my guest user. I also check here if the passed auth object is successful, to keep authorizers self-contained.
# slices/main/lib/authorizers/guest.rb

module Main
  module Authorizers
    class Guest
      def call(auth:, **)
        return false unless auth.success?

        auth.value!['scopes'].include?('public.articles')
      end
    end
  end
end
If the auth contains scopes, we check if it contains a particular one, for 'public.read' and return false otherwise.
This approach is super easy to extend later, and as each authorizer is self-contained and kept very small, changing the logic of permissions is usually trivial even far in the future.
A quick note here about the call method: What I usually do here, is instead of returning the true/false value, return the Success or Failure monad with a more detailed value passed inside.
I covered monads in episode seven so feel free to check it out!
This allows me to chain returned values together and keeps my code way less bug-prone. However, it's a topic for a different video.
Then in the action, I only need to call my authorizer and inject it as a dependency using the Deps module for the main slice.
# slices/main/actions/articles/published.rb

module Main
  module Actions
    module Articles
      class Published < Main::Action
        include Deps[
          repo: 'persistence.repositories.articles',
          authorizer: 'authorizers.guest'
        ]

        include JayDoubleuTee::Auth

        def handle(req, res)
          res.headers['Content-Type'] = 'application/json'

          if authorizer.call(auth: auth)
            res.body = Serializers::Article.new(repo.published).serialize
          else
            res.body = { error: 'Forbidden request' }
            res.status = 403
          end
        end
      end
    end
  end
end
The behavior of my application stays the same. In the browser, I get the successful response for the correct scopes, but if I'll change it, I get the forbidden response instead.
Summary
Implementing authorization in rack application can be trivial, and as basically any Ruby Web application is based on Rack, if there are Rack-Compatible gems to achieve a particular task, integrating them can be as easy as making a toast.
That's all for today, I hope you enjoyed this episode and that my ridiculous naming setback will help you prevent such issues in your career!
If you want to see more content in this fashion, Subscribe to my YT channel, Newsletter and follow me on Twitter!
Thanks
I want to especially thank my recent sponsors, Andrzej Krzywda, Sebastjan Hribar, and Useo for supporting this project, I appreciate it a lot!
By helping me with a few dollars per month creating this content, you are helping the open-source developers and maintainers to create amazing software for you!
And remember, if you want to support my work even without money involved, the best you can do is to like, share and comment on my episodes and discussions threads. Help me add value to the Open Source community!
Additionally,
- Georg Bommeli for a great cover image
- Tim Riley for pointing me out how tricky English can be
Add your suggestion to our discussion panel!
I'll gladly cover them in the future episodes! Thank you!