In Hanami Mastery, I often need to do some text manipulations on my markdown files, for different needs. One example of it is, of course, HTML rendering based on my markdown files.
In this episode, I'm going to show you how I quickly transform markdown input into HTML output ready to be used by different tools.
The Problem
I'm going to write a CLI script, to take my markdown file content as input, and generate HTML out of it.
If you're wondering, why I need the console tool for this, the answer is pretty interesting. I'm using Podia as a hosting provider for my Hanami Mastery PRO episodes, courses, and all the premium content for rubyists wanting something more. However great their product is, their editor has some caveats.
To easily copy and paste the content into Podia and publish effortlessly, I need to:
- Remove metadata from markdown
- Remove custom callout components
- Transform my content into HTML
- Transform my image links to include host information
- Transform all headers into an
h1header
This sounds like a lot, but ruby can do wonders for us if used well so I can leave with it for now.
CommonMarker
To easily transform my markdown files into HTML, I'm going to work with the commonmarker gem.
CommonMarker is a small library that serves just one purpose - to take markdown as input, and make HTML documents out of it.
Maintained by Garen Torikian, it's one of the old but actively curated projects, that are just finished but widely used by the majority of markdown-based projects.
At this point, it's used by millions of people directly or indirectly, and if you work with markdown files, make sure you check it out or even sponsor the project!
Initial code
For this episode, I'm going to work with the code extracted from hanamimastery-cli gem.
I have my hanamimastery-cli gem source code here, which is made using dry-cli under the hood. I've described in detail how dry-cli works in episode 37, make sure you check it out!
The difference here is that I've registered the new command, named PRO. This just fetches the episode content using the repository, calls a transformation by passing this content as input, and saves the result to a file in case it's demanded.
Today we'll focus on this transformation meat and code it out!
Our goal is to take this markdown input file
---
metadata: true
---
paragraph 1
paragraph 2
# Level 1 header
# Level 2 Header
# Level 3 Header

:::call to action 1
sample content inside
- with line items
<>
:::
And produce this HTML out of it:
<p>paragraph 1</p>

<p>paragraph 2</p>

<h1><a href="#level-1-header" aria-hidden="true" class="anchor" id="level-1-header"></a>Level 1 header</h1>

<h1><a href="#level-2-header" aria-hidden="true" class="anchor" id="level-2-header"></a>Level 2 Header</h1>

<h1><a href="#level-3-header" aria-hidden="true" class="anchor" id="level-3-header"></a>Level 3 Header</h1>

<p><img src="https://hanamimastery.com/images/episodes/34/sample-image.png" alt="Sample Image" /></p>
You can see header levels unified here, images are prefixed with the external host, and custom marks started with triple: had been completely cleared out.
Then all that is transformed into HTML.
Now Let's make it to work.
Transformation test
Let me start by writing a test for this. In the spec directory, I'm going to add a new file named to_pro_spec.rb. Here I'll have two content variables, one is the input, and the other is my expected HTML result. I'll just paste prepared content just to save you from watching how I write meaningful HTML and markdown on the screen.
let(:content) do
<<~STRING
paragraph 1
paragraph 2
# Level 1 header
# Level 2 Header
# Level 3 Header

:::call to action 1
sample content inside
- with line items
<>
:::
STRING
end
  let(:expected) do
    <<~STRING
    <p>paragraph 1</p>
    <p>paragraph 2</p>
    <h1><a href="#level-1-header" aria-hidden="true" class="anchor" id="level-1-header"></a>Level 1 header</h1>
    <h1><a href="#level-2-header" aria-hidden="true" class="anchor" id="level-2-header"></a>Level 2 Header</h1>
    <h1><a href="#level-3-header" aria-hidden="true" class="anchor" id="level-3-header"></a>Level 3 Header</h1>
    <p><img src="https://hanamimastery.com/images/episodes/34/sample-image.png" alt="Sample Image" /></p>
    STRING
  end
Then In the actual test example, I will just call the transformation function and make sure that my actual result is the same as expected.
describe '#call' do
  it 'renders proper HTML' do
    actual = subject.call(content)
    expect(actual).to eq(expected)
  end
end
Now having this, let's create the actual transformation file.
Transformation
I'm adding now a new transformation file, which is just a simple class with a single call method, accepting a markdown string as an input.
module Hanamimastery
  module CLI
    module Transformations
      class ToPRO
        HOST = "https://hanamimastery.com"

        def call(content)
          # Transformation logic inside
        end
      end
    end
  end
end
Then inside I'm going to write my transformation logic.
First of all, let's check what will happen if I'll make use of the commonmarker out of the box. If you have commonmarker installed on your machine, just require it at the top of the script.
require 'commonmarker'
Then in the call method, I need to use to_html on the Commonmarker class passing my content as an argument, and check the result.
def call(content)
  result = Commonmarker.to_html(content)
  puts result
end
Calling this will show us clearly, that my Markdown had been successfully transformed into HTML and in most of cases, it would be good enough.
It automatically added header links, and replaced my paragraphs and images. However, there are some caveats here I need to work on still.
Hanamimastery::CLI::Transformations::ToPRO
#call
<p>paragraph 1</p>
<p>paragraph 2</p>
<h1><a href="#level-1-header" aria-hidden="true" class="anchor" id="level-1-header"></a>Level 1 header</h1>
<h1><a href="#level-2-header" aria-hidden="true" class="anchor" id="level-2-header"></a>Level 2 Header</h1>
<h1><a href="#level-3-header" aria-hidden="true" class="anchor" id="level-3-header"></a>Level 3 Header</h1>
<p><img src="/images/episodes/34/sample-image.png" alt="Sample Image" /></p>
<p>:::call to action 1<br />
sample content inside</p>
<ul>
<li>with line items<br />
<><br />
:::</li>
</ul>
Cleanups
I want to remove everything between the triple ":" characters because those are the custom CTA components I don't need in PRO episodes.
For that, I'll use a gsub method with a proper regular expression filter.
result = content.gsub(/:::(.*?):::/m, '')
result = Commonmarker.to_html(result)
# ...
Then I want to prefix all my images with a host because I'll host images on my own just in case I'll publish some of those premium episodes in the future.
result
  .gsub('src="/images', %{src="#{HOST}/images})
Then my final transformation for today, will be to unify the levels of all the headers in the document. I'll repeat the trick, replacing all header marks with an H1 HTML tag.
result.gsub(/<\/h\d>/, "</h1>")
Code verification
Now we can check if our transformation works as expected. First Let me run my test.
bundle exec rspec
The HTML is rendered, but it seems, that my custom components had not been removed from the processing. Let me check what happened.
Oh, I forgot about rendering the HTML for already filtered markdown, not actual input. Now let me try again.
This time it's better, but again a little failure - this time I've made a mistake in the regular expression, missing the closing character of the HTML tag. I will add it quickly here... and try again.
Now It's all green! Yaay!
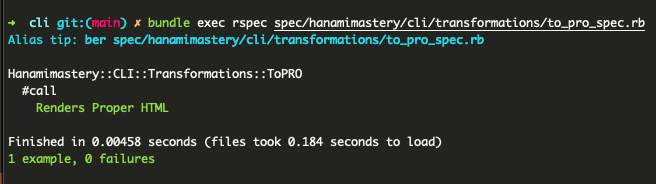 Successful test results
Now let me call the CLI command with the actual episode number to verify the actual content. This time I'll add the -s flag, to save the result to the file on the disk.
I have my file listed here, so let me open it in the browser now...
exec/hanami_mastery pro -s 36
open 36-episode.html
 HTML version of an episode content
And voila! My HTML is properly generated, and I can easily copy that to my podia editor without any manual changes.
Again, if anything here is unclear on how things work, I recommend checking episode 37, where I've described commands and DRY-CLI in detail.
Everything seems to be fine and working though!
Summary
This is how yow you can easily generate HTML out of your markdown files and perform some custom text manipulations with it in your projects.
Become an awesome subscriber!
If you want to see more content in this fashion, Subscribe to my YT channel, Newsletter and follow me on Twitter!
Thanks
I want to especially thank my recent sponsors,
and all the Hanami Mastery PRO subscirbers, for supporting this project, I really appreciate it!
Consider sponsoring?
If you want to support us, check out our Github sponsors page or join Hanami Mastery PRO to gain the access to more learning resources and our private discord server!
Add your suggestion to our discussion panel!
I'll gladly cover them in the future episodes! Thank you!