Hi there!
Hanami 2.2 beta went out, and the team is squeezing everything to wrap up the last remaining tasks. Therefore, I've decided to challenge the new release to show how easy it is right now to start a new web prototype. So let's make a blog in a few minutes.
Disclaimer
Hanami 2.2 generates empty views, and for Hanami Mastery videos I use Bulma CSS framework, so to save your eyes from looking at how I write HTML boilerplate I have extended the default generators using the hanami-cli_bulma gem, that gives basic bulma support for newly created hanami views.
Generate a new app.
I'll first install the hanami gem, and then hanami-cli_bulma gem, overriding executable, so we'll use bulma integration for generating application. Feel free to add a few minutes to the whole run for the HTML burden. Over time the generators' experience will be improved in the plain hanami-cli too!
echo "nodejs 21.2.0\nruby 3.3.5" > .tool-versions
gem install hanami --pre
gem install hanami-cli_bulma
Now I can create the new hanami app, named hanami_mastery, and that will include the Bulma integration for free.
hanami new hanami_mastery
This command had done a few things:
- created all the necessary files for the new hanami app with sqlite 3 integration, assets and views in place,
- installed the missing gems
- installed node packages.
Now I can go to the app folder, and you can see all files generated.
cd hanami_mastery
Bulma integration overview
A few things to notice. bulma generators added a few tweaks to the default generated files. In the app.css folder, you'll see the @import statement for the Bulma CSS.
@import "https://cdn.jsdelivr.net/npm/bulma@0.9.2/css/bulma.min.css";
Then opening the appplication layout file shows you that I've automatically created some HTML burden to save your precious time.
<body>
  <nav class="navbar" role="navigation" aria-label="main navigation">
    <div class="navbar-brand">
      <a class="navbar-item" href="https://hanamimastery.com">
        <img src="https://hanamimastery.com/logo-hm-letter.jpeg" height="28">
      </a>
    </div>
    <div id="top-navigation" class="navbar-menu">
      <div class="navbar-start">
        <%= link_to 'Home', '/', class: 'navbar-item' %>
      </div>
    </div>
  </nav>

  <section class="section">
    <div class="container">
      <%= yield %>
    </div>
  </section>

  <footer class="footer">
    <div class="content has-text-centered">
      <p>
        <strong>Hanami mastery</strong>. The source code is licensed
        <a href="http://opensource.org/licenses/mit-license.php">MIT</a>. The website content
        is licensed <a href="http://creativecommons.org/licenses/by-nc-sa/4.0/">CC BY NC SA 4.0</a>.
      </p>
    </div>
  </footer>
  <%= javascript_tag "app" %>
</body>
Now let me jump to to the DB implementation.
DB Preparation
Our goal is to have a CRUD-like article listing, with preview, creation and deletion in place, so I'll start from creating a few articles records.
To do that, first I need a migration file which I can create by running migration generator.
bundle exec hanami g migration articles
# => Created config/db/migate/202410153056_articles.rb
Inside I want to create the articles table with just a few fields. It needs to contain ID as primary key, and to make things simple I'll leave it as integer which is the default.
Then I need the title and the content for the preview, and let me yet add the status field, with default value set to 0. I am not sure if I'll use it in this showcase, but it does not hurt to have it here.
# config/db/migate/202410153056_articles.rb

ROM::SQL.migration do
  # Add your migration here.
  #
  # See https://sequel.jeremyevans.net/rdoc/files/doc/migration_rdoc.html for details.
  change do
    create_table :articles do
      primary_key :id
      String :title, null: false
      String :content, null: false
      Integer :status, null: false, default: 0
    end
  end
end
Having that I can run the migration and play with the db in my console.
bundle exec hanami db migrate
This db mibrate command generated the structure.sql file, that can be used to quickly setup db without running all the migrations - useful for commands like: hanami db prepare
Having db set up, let me generate articles relation file.
bundle exec hanami g relation articles
This is a table representation in our ruby application, and for the barebone usage, this is the minimum you need to work with data in hanami apps.
More on using relations directly
I've talked about this in ROM setup from scratch, episode, so feel free to check it out.
Here, however, I want to make use of the auto_struct feature and leverage repositories for convenience, so I'll quickly generate the article repository and the struct.
bundle exec hanami g repo article
bundle exec hanami g struct article
After that I'll open the console and load the repo from the App container. To play with.
bundle exec hanami c
$> repo = Hanami.app['repos.article_repo']
# => #<HanamiMastery::Repos::ArticleRepo...>
$> repo.articles.to_a
[hanami_mastery] [INFO] [2024-10-15 18:24:12 +0200]   Loaded :sqlite in 0ms SELECT `articles`.`id`, `articles`.`title`, `articles`.`content`, `articles`.`status` FROM `articles` ORDER BY `articles`.`id`
# => []
You can see, that I have the repo instance already configured to work with the database, and I can access the articles relation through it, which returns no records at the moment.
Repository commands
While I could already use relation to create new objects, I want to use repo.create directly for convienience. However, if I'll run it now, article creation will fail with NoMethodError.
 Undefined method create on repo
This happens, because Hanami encourages developers to be explicit in what they need, and the framework provides you with minimal setup, allowing you to enable exactly those features you want.
This way, in the main application repository, I'll enable create, update and delete commands on the repository directly, so I don't need to go through the relations to do it.
# app/db/repo.rb

module HanamiMastery
  module DB
    class Repo < Hanami::DB::Repo
      commands :create, update: :by_pk, delete: :by_pk
    end
  end
end
Now article creation works as you may expect and we'll leverage that in our app in a moment. For now, I'll create a second article yet and will move to the next part of the episode, which is the article listing.
Article's listing
I'll start with action generation, as it immediately generates views together, saving additional precious minutes.
bundle exec hanami g action articles.index
#=> Updated config/routes.rb
#=> Updated app/actions/articles/index.rb
#=> Updated app/views/articles/index.rb
#=> Updated app/templates/articles/index.html.erb
This adds a new route to the routes.rb, and generates all necessary files needed to handle this endpoint. Now I need to visit the articles/index template, where you may see, that generator already added a few HTML burden for me. It uses the items list, and loops through them showing the table rows with some hardcoded details.
<h1 class="title is-1">HanamiMastery::Views::Articles::Index</h1>

<div class="content">
  <table class="table">
    <thead>
      <tr><td>Title</td><td>Content</td><td>Actions</td></tr>
    </thead>
    <tfoot>
      <tr><td>Title</td><td>Content</td><td>Actions</td></tr>
    </tfoot>
    <tbody>
      <% items.each do |item| %>
        <tr>
          <td>Item title</td>
          <td>Item Content</td>
          <td>
            <%= link_to 'Edit', '#', class: 'button is-link' %>
            <%= link_to 'Destroy', '#', class: 'button is-danger' %>
          </td>
        </tr>
      <% end %>
    </tbody>
  </table>
</div>
If I run the server and visit the page, I'll get the undefined method: items error, which is kind of expected. Let me add it in the view object.
Index view
Here I need to expose the items method to the template, so template can access it, and inside I'll fetch all articles from the repository.
# app/views/articles/index.rb

module HanamiMastery
  module Views
    module Articles
      class Index < HanamiMastery::View
        include Deps[repo: 'repos.article_repo']

        expose :items do
          repo.all
        end
      end
    end
  end
end
Then in the base repository, I'll add the all method. It could use root directly, but I prefer to define the default scope I want to have for all repositories, which will remain private. One of the reasons for that I will share with you in the upcoming episode.
# app/db/repo.rb

module HanamiMastery
  module DB
    class Repo < Hanami::DB::Repo
      commands :create, update: :by_pk, delete: :by_pk

      def all
        default_scope.to_a
      end

      private

      def default_scope
        root
      end
    end
  end
end
Now our articles listing, while hardcoded, already shows 2 items on the list.
Then if I visit the template and replace the hardcoded fields to fetch data from the item object, I'll get the legit articles listing for my blog.
# app/templates/articles/index.html.erb

<tbody>
  <% items.each do |item| %>
    <tr>
      <td><%= link_to item.title, routes.path(:article, id: item.id), class: 'is-link' %></td>
      <td><%= item.content %></td>
      <td>
        ...
      </td>
    </tr>
  <% end %>
</tbody>
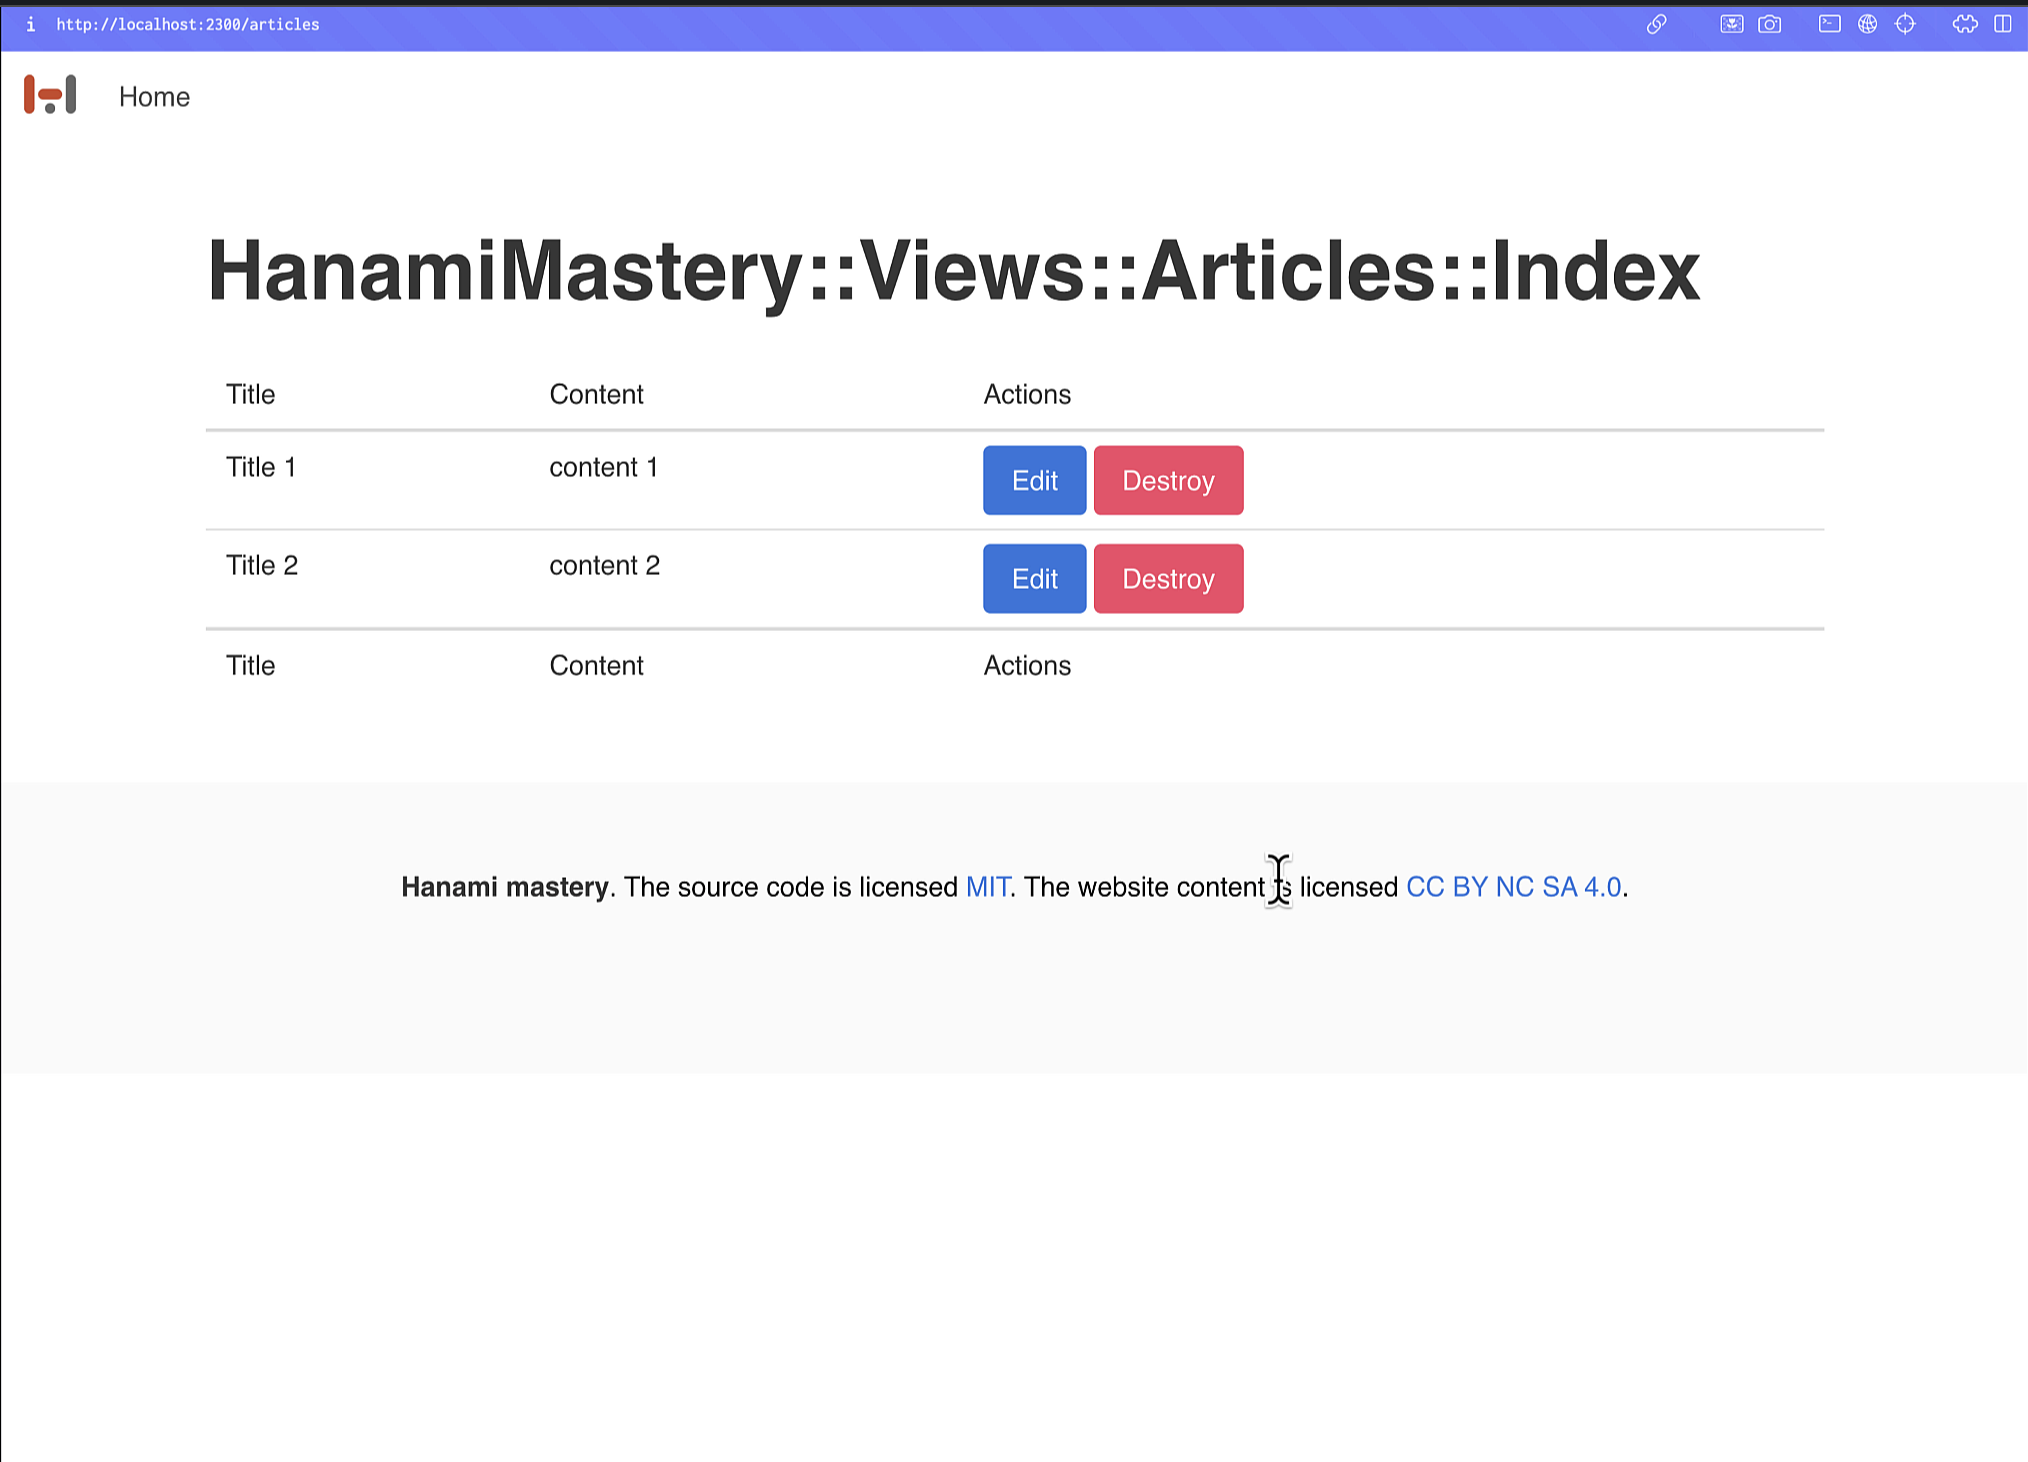 Articles index page preview
Good! Next will be the article preview!
Article details page
I want the article title to be a link, that after being clicked, redirects you to the article's details page. For that, I'm going to replace the string with the link_to helper, passing :article path as a second argument, and add some bulma tags to make it pretty.
Then I'll generate a new action, named articles.show
bundle exec hanami g action articles.show
This behaves exactly as you may expect. It adds a route to the routes file, creates the action file to handle the request, and a view file, together with a template, to show the response.
Named routes
The issue you may face at this point is that when you try to refresh the page again, you'll get the error pointing to the fact, that the route named :article cannot be found. I can solve it by naming my newly created article passing in the as: :article argument.
# config/routes.rb

module HanamiMastery
  class Routes < Hanami::Routes
    get "/articles", to: "articles.index", as: :articles
    get "/articles/:id", to: "articles.show", as: :article
  end
end
Having that fixed, let me open the article's show view file, and add the article fetching logic there. Similar to the index view, I need the repository and expose the object I want to work with in the template - but this time I'll need the :id parameter from the request, so this is what I use in the block.
Then inside, I'm just going to find the article by its ID.
# app/views/articles/show.rb

module HanamiMastery
  module Views
    module Articles
      class Show < HanamiMastery::View
        include Deps[repo: 'repos.article_repo']

        expose :item do |id:|
          repo.find(id)
        end
      end
    end
  end
end
I need to yet add the find method in the base repository, that will accept the ID, and return a single record from the table.
TODO: notice callout
I've implemented it in a way to raise an error in case of not finding the object, but you can remove the exclamation mark to return nil instead.
# app/db/repo.rb

def find(id)
  default_scope.by_pk(id).one!
end
Finally, in the template I'll replace hardcoded strings with article attributes and this should be all needed to check the preview of my article.
Amazing!
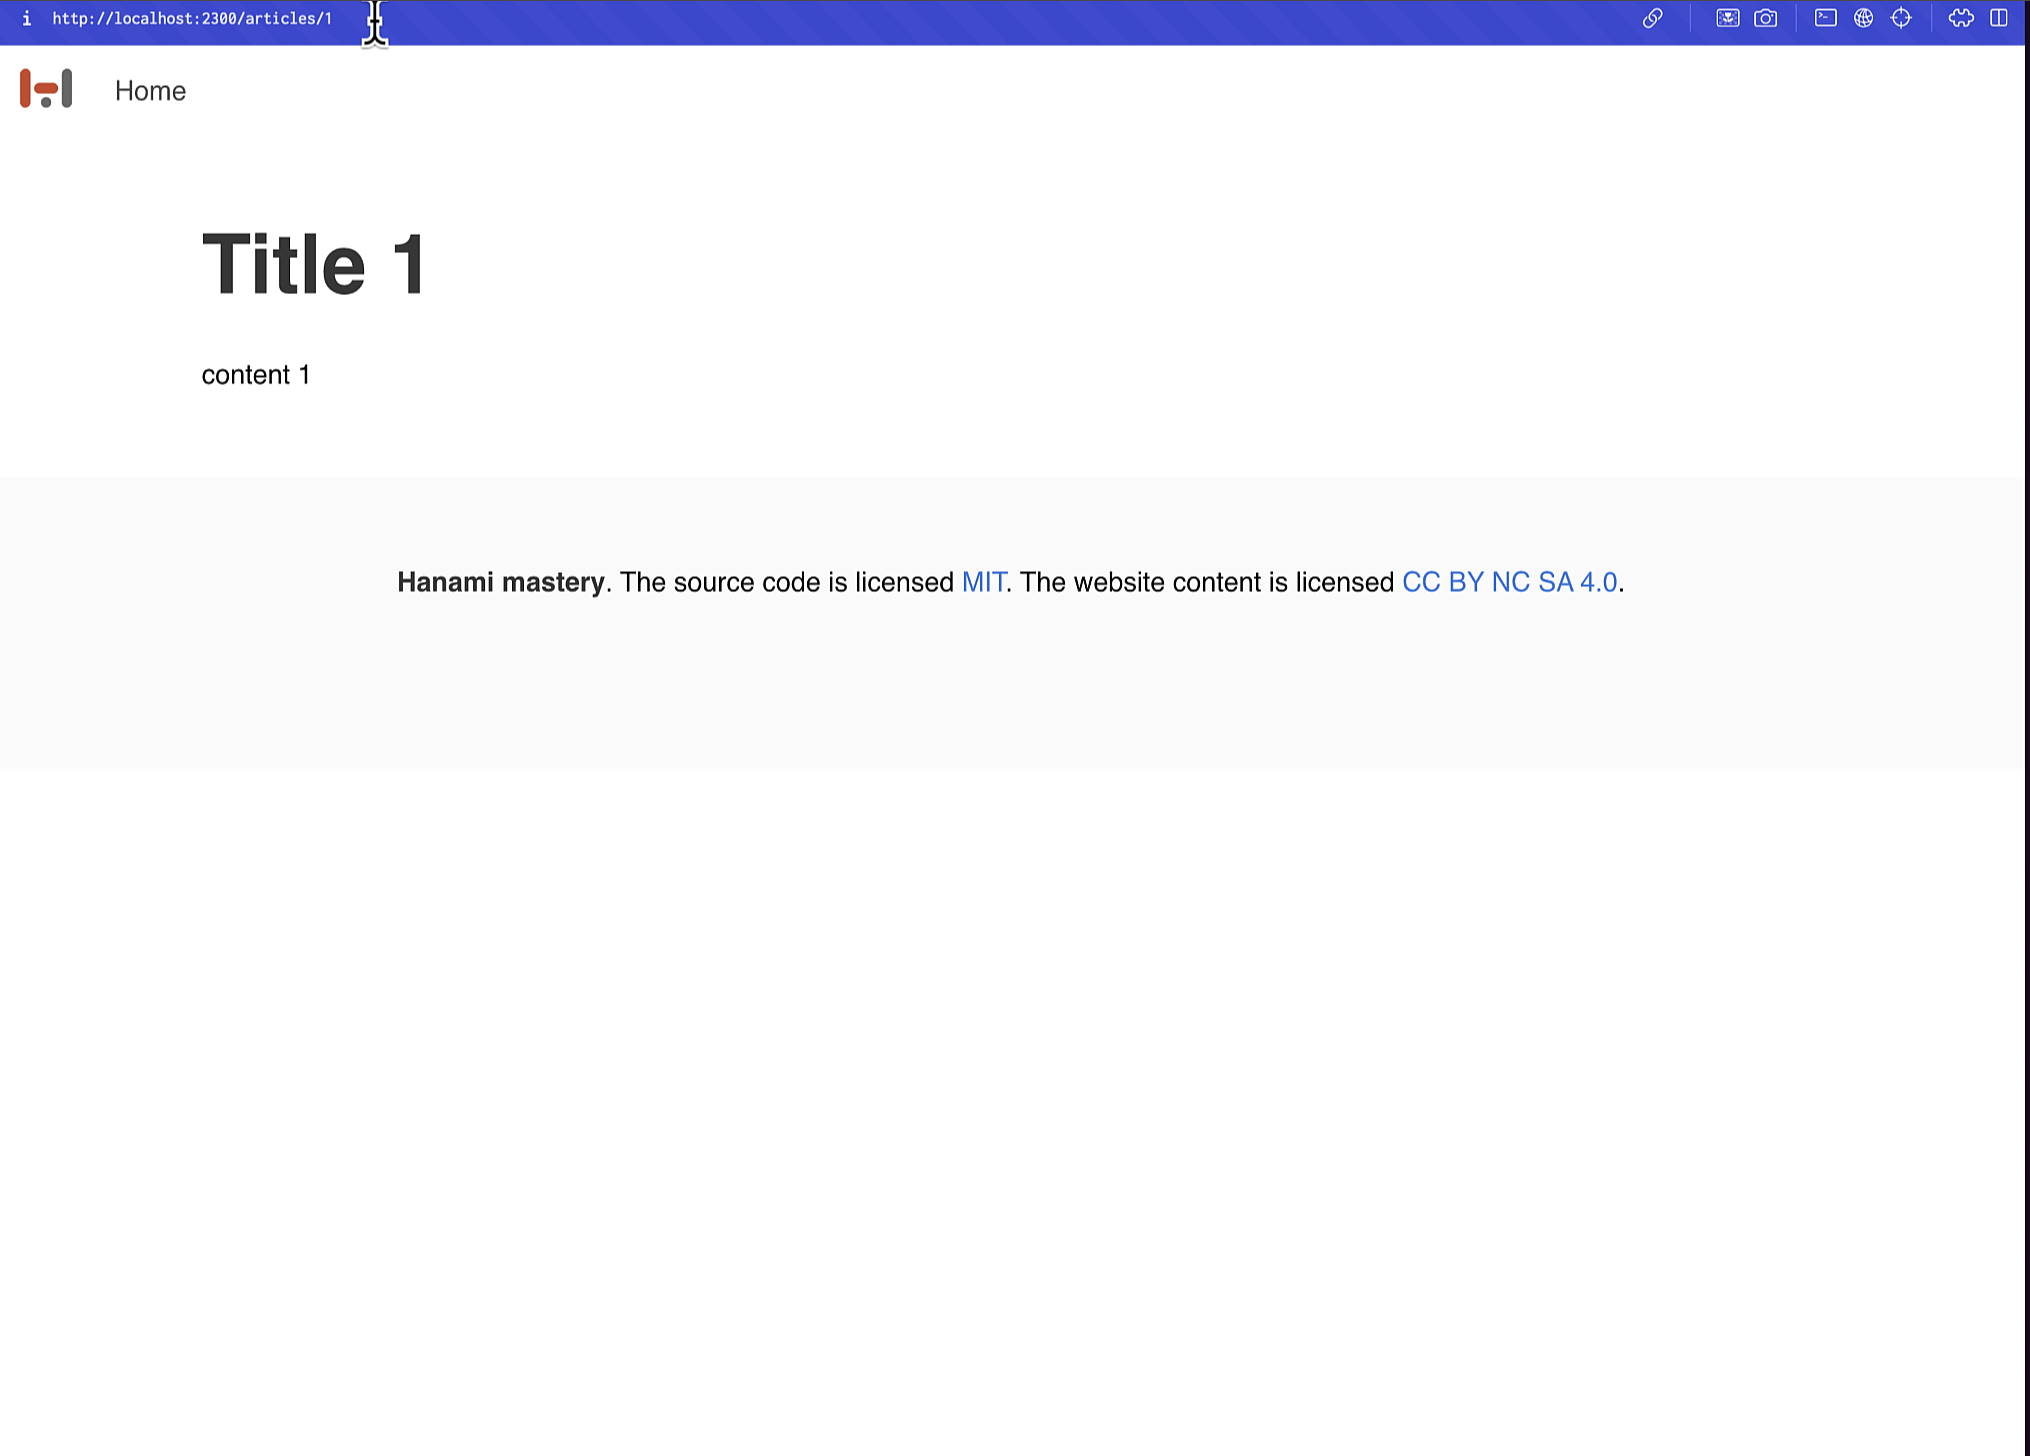 Article details page preview
Params validation
Now a few words about error handling. Currently, when we pass in any string at the end of the URL, it'll be interpreted by the router as ID, and our DB will be called, checking for ID's presence. Then server returns DB error to the user.
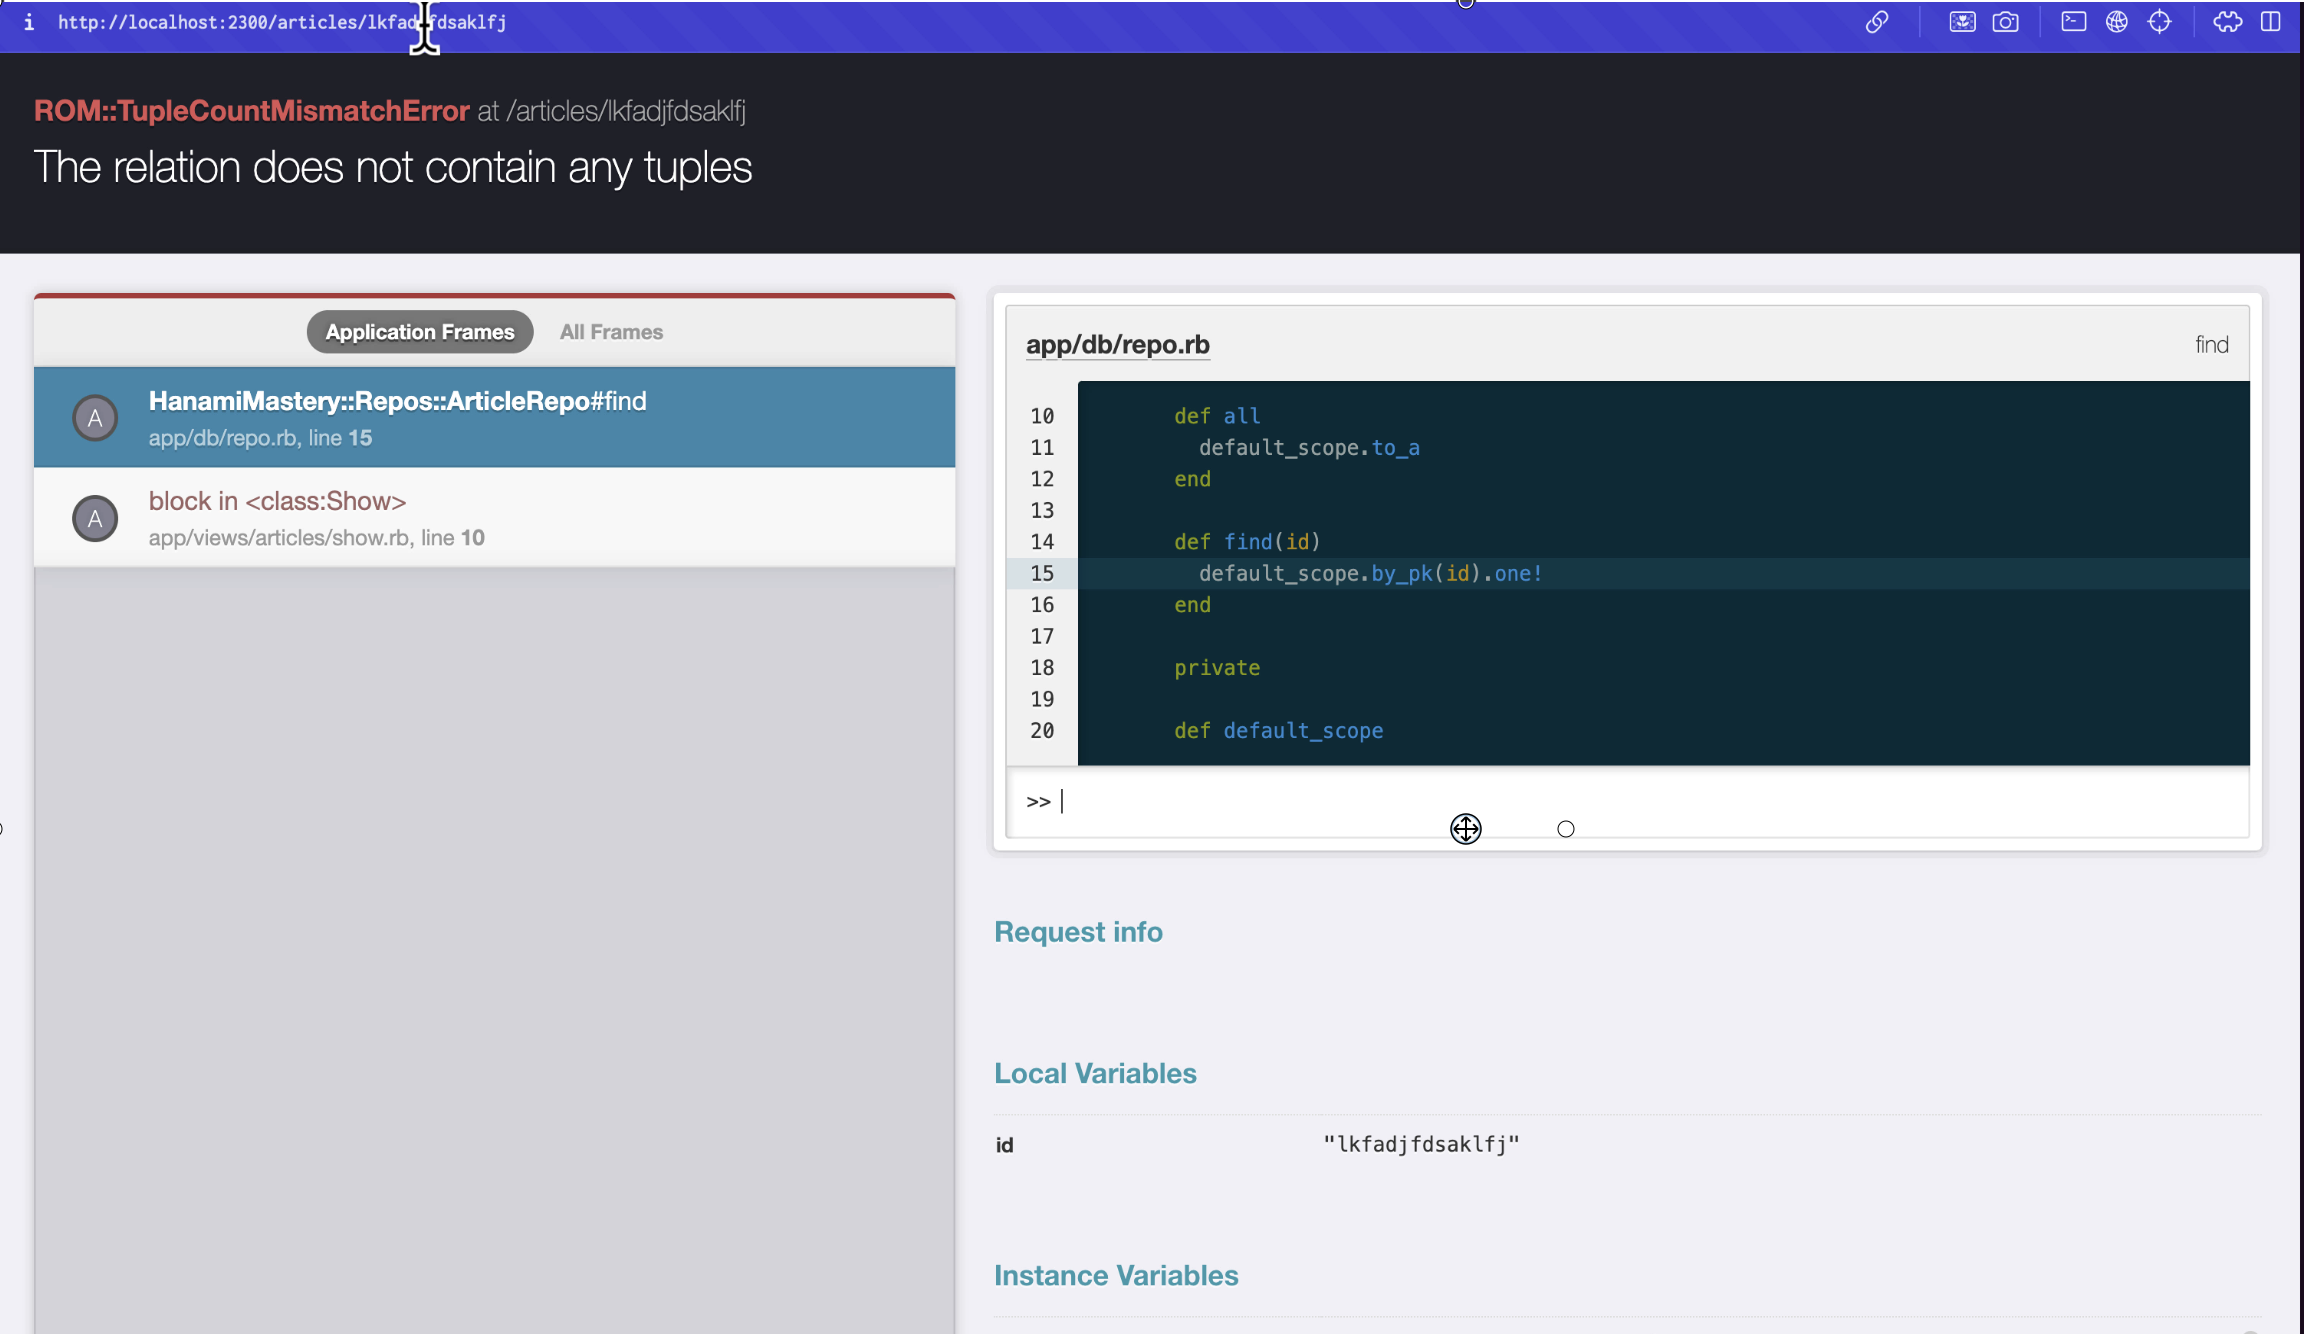 Article not found DB error
I would love to not even hit the DB when the ID is not an integer or does not match other restrictions, like being lower than one.
For that, I can open the action file, and halt the request processing in case of params being invalid. I'll return 404 status for now.
More on error handling
If you are interested in detailed error handling for hanami applications, I've already 2 episodes about this topic, starting from Flash message rendering, which I recommned for you to check out.
Then above, I'll make sure that ID parameter needs to be coercaible to String by using built-in action validation rules that hanami provides out of the box.
# app/actions/articles/show.rb

module HanamiMastery
  module Actions
    module Articles
      class Show < HanamiMastery::Action
        params do
          required(:id).filled(:integer)
        end

        def handle(request, response)
          halt 404 unless request.params.valid?
        end
      end
    end
  end
end
Now when you'll try to fetch the article using a parameter that is not an integer, we'll never even try to render the view, not even mentioning to hit the DB!
Navigation
Articles previewing works fine. Now, before I add some form actions, let me update the top navigation links to quickly switch between articles listing and the details page
<div class="navbar-start">
  <%= link_to 'Home', '/', class: 'navbar-item' %>
  <%= link_to 'Articles', routes.path(:articles), class: 'navbar-item' %>
</div>
With this, let me go to the last two features: creating and deleting the article.
Create article
I'll generate two actions - New and Create - using separate generator calls.
bundle exec hanami g action articles.new
bundle exec hanami g action articles.create
You may see, that the create action generator did not create the view or template file, which is expected. Now Let me check the routes and add the aliases for each of them.
# config/routes.rb

get "/articles/new", to: "articles.new", as: :new_article
post "/articles", to: "articles.create", as: :create_article
Then in the top navigation of my application layout I'll add a button to visit the new article page, so now I can access it from any place.
<div class="navbar-end">
  <%= link_to 'New article', routes.path(:new_article), class: 'button is-link' %>
</div>
And done. My blog is starting to take a shape!
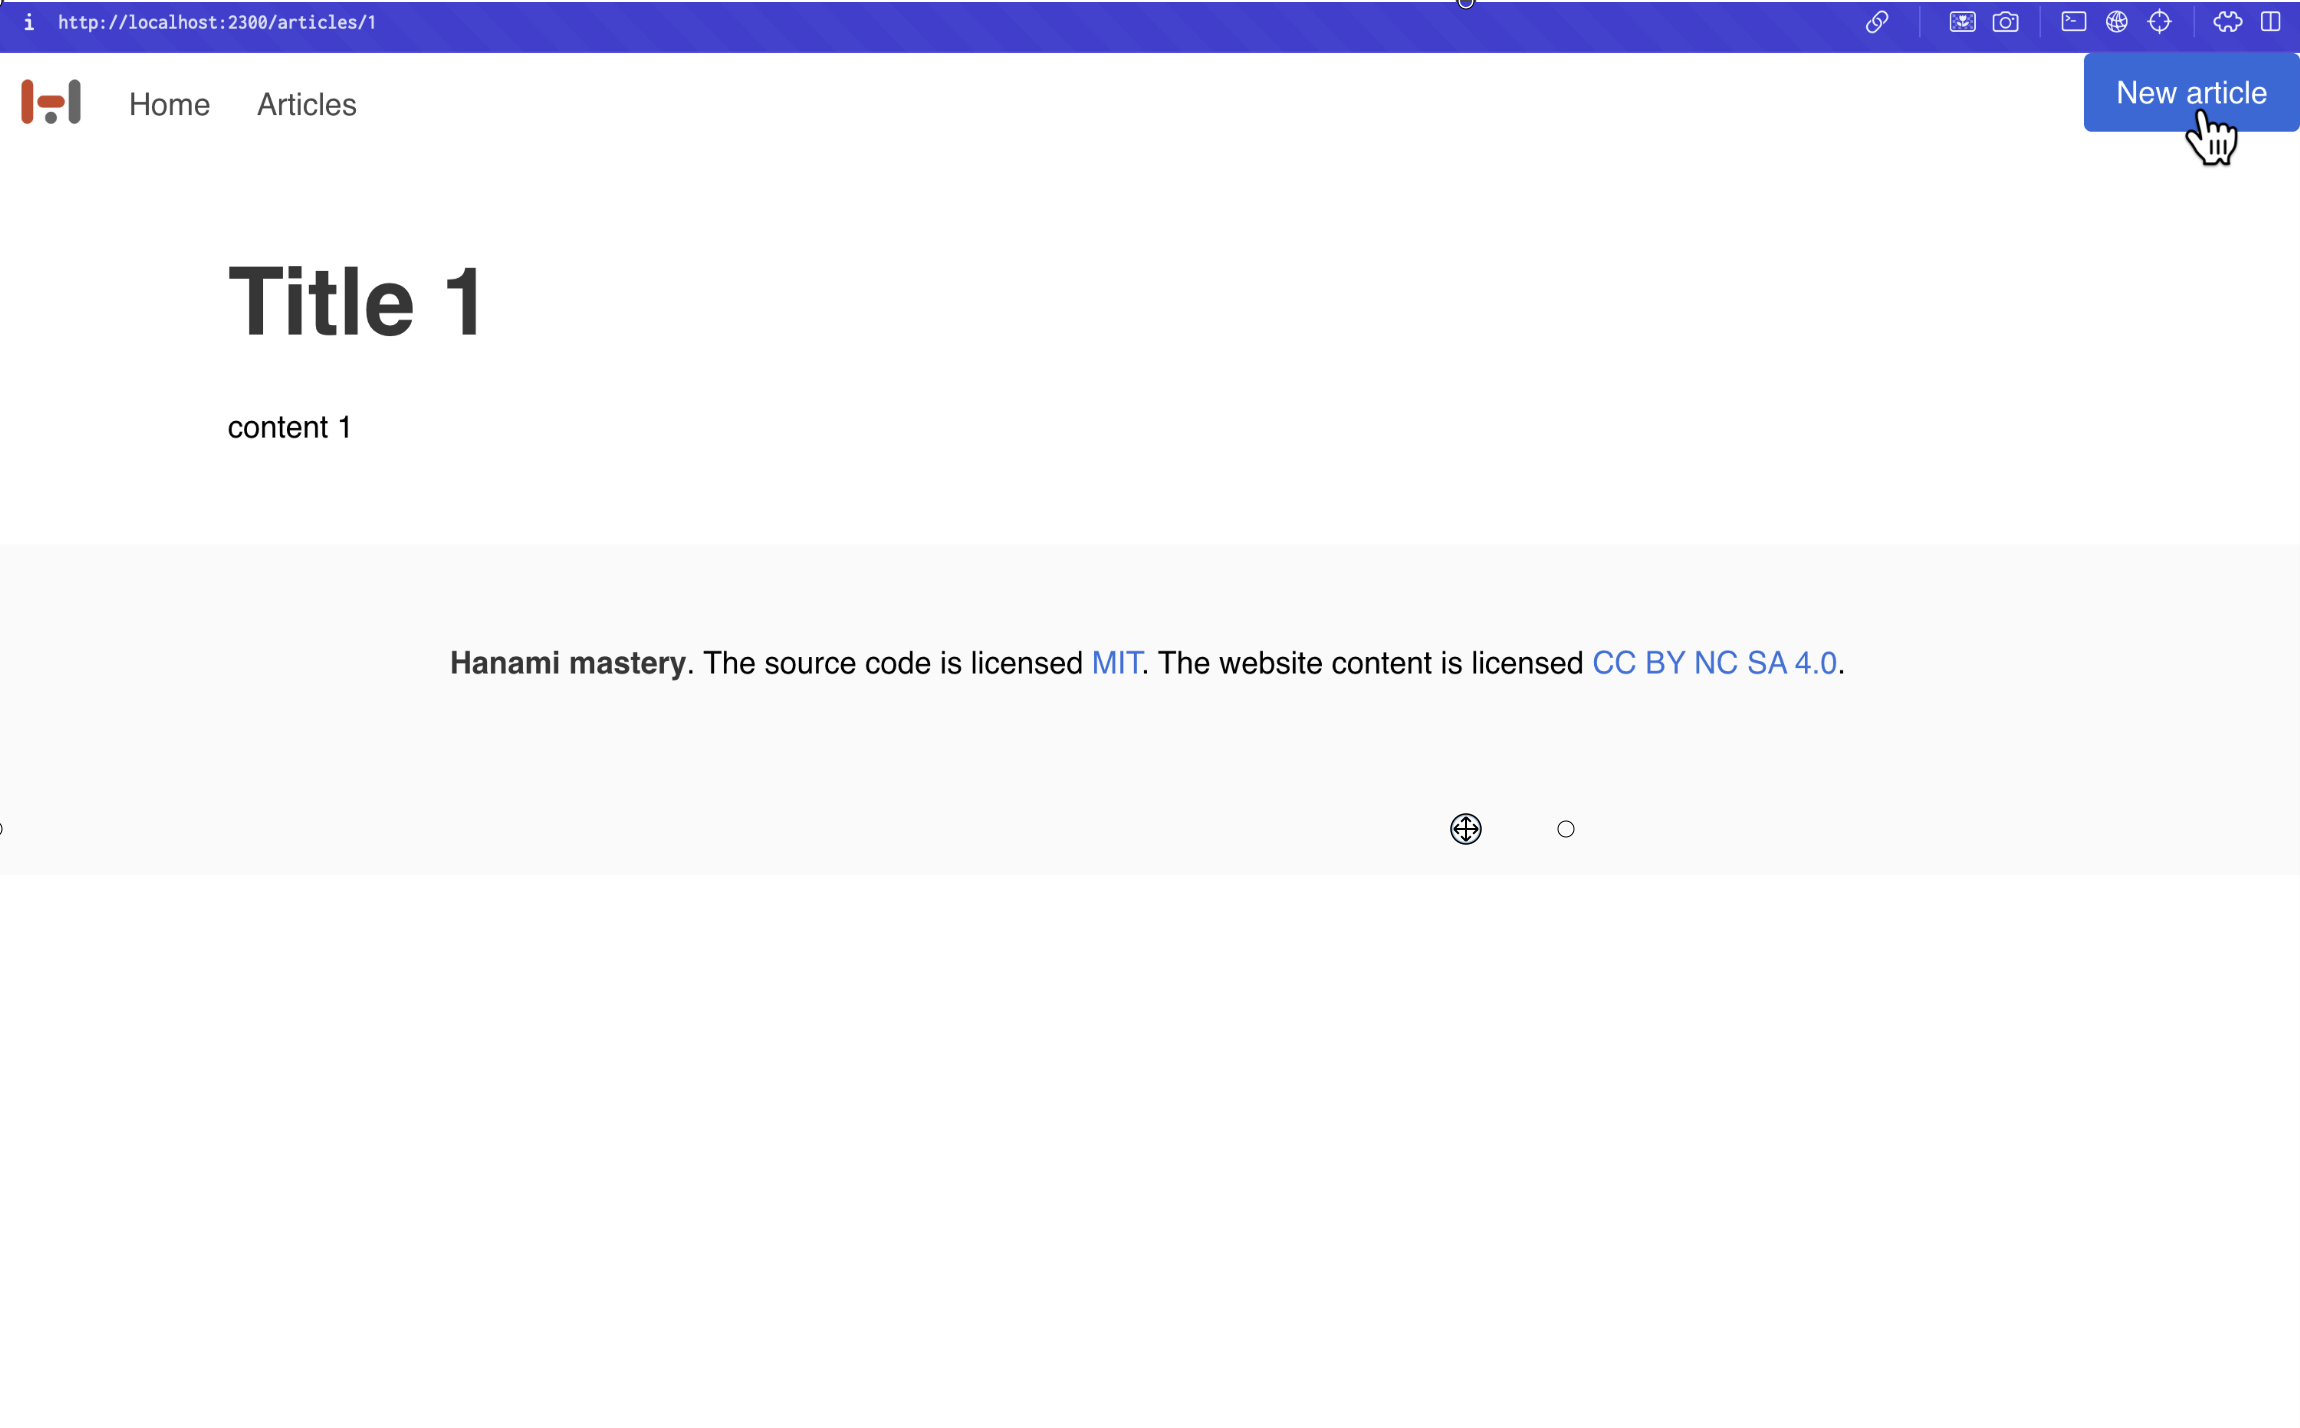 New article button
Form rendering
When I click on it, I'll get a very simple and hardcoded form example, that I need to tweak now a bit to make it working. First of all, I want to show the "New Article" title for the page instead of action class.
Then I want the form to wrap its fields into the article object, and use the create_article POST request when submitted. Finally I need to add second field to the form, which will allow me to type in the content of my article when being created.
This will be a textarea type of field, with different class name and the placeholder.
I'll also update the icon here, but that's irrelevant. I don't have the FontAwesome integrated here, but if you are keen how to do it, I already have a tutorial for this. Check episode 51 for all the details of how to configure font awesome in your apps!
Now in the form I want to update yet the cancel button, to redirect me to the articles list.
<h1 class="title is-1">New article</h1>

<div class="content">
  <%= form_for :article, routes.path(:create_article) do |f| %>
    <div class="field">
      <%= f.label(:title, class: "label") %>
      <div class="control">
        <%= f.text_field(:title, class: 'input', placeholder: 'Title') %>
        <span class="icon is-small is-left">
          <i class="fas fa-pencil"></i>
        </span>
      </div>
    </div>

    <div class="field">
      <%= f.label(:content, class: "label") %>
      <div class="control">
        <%= f.text_area(:content, class: 'textarea', placeholder: 'Content') %>
        <span class="icon is-small is-left">
          <i class="fas fa-book"></i>
        </span>
      </div>
    </div>

    <div class="field is-grouped">
      <div class="control">
        <%= f.submit "Submit", class: "button is-link" %>
      </div>
      <div class="control">
        <%= link_to "Cancel", routes.path(:articles), class: "button is-link is-light"%>
      </div>
    </div>
  <% end %>
</div>
Now I have a fully functional article form, and the only thing left now is to provide the handler for it in the corresponding action.
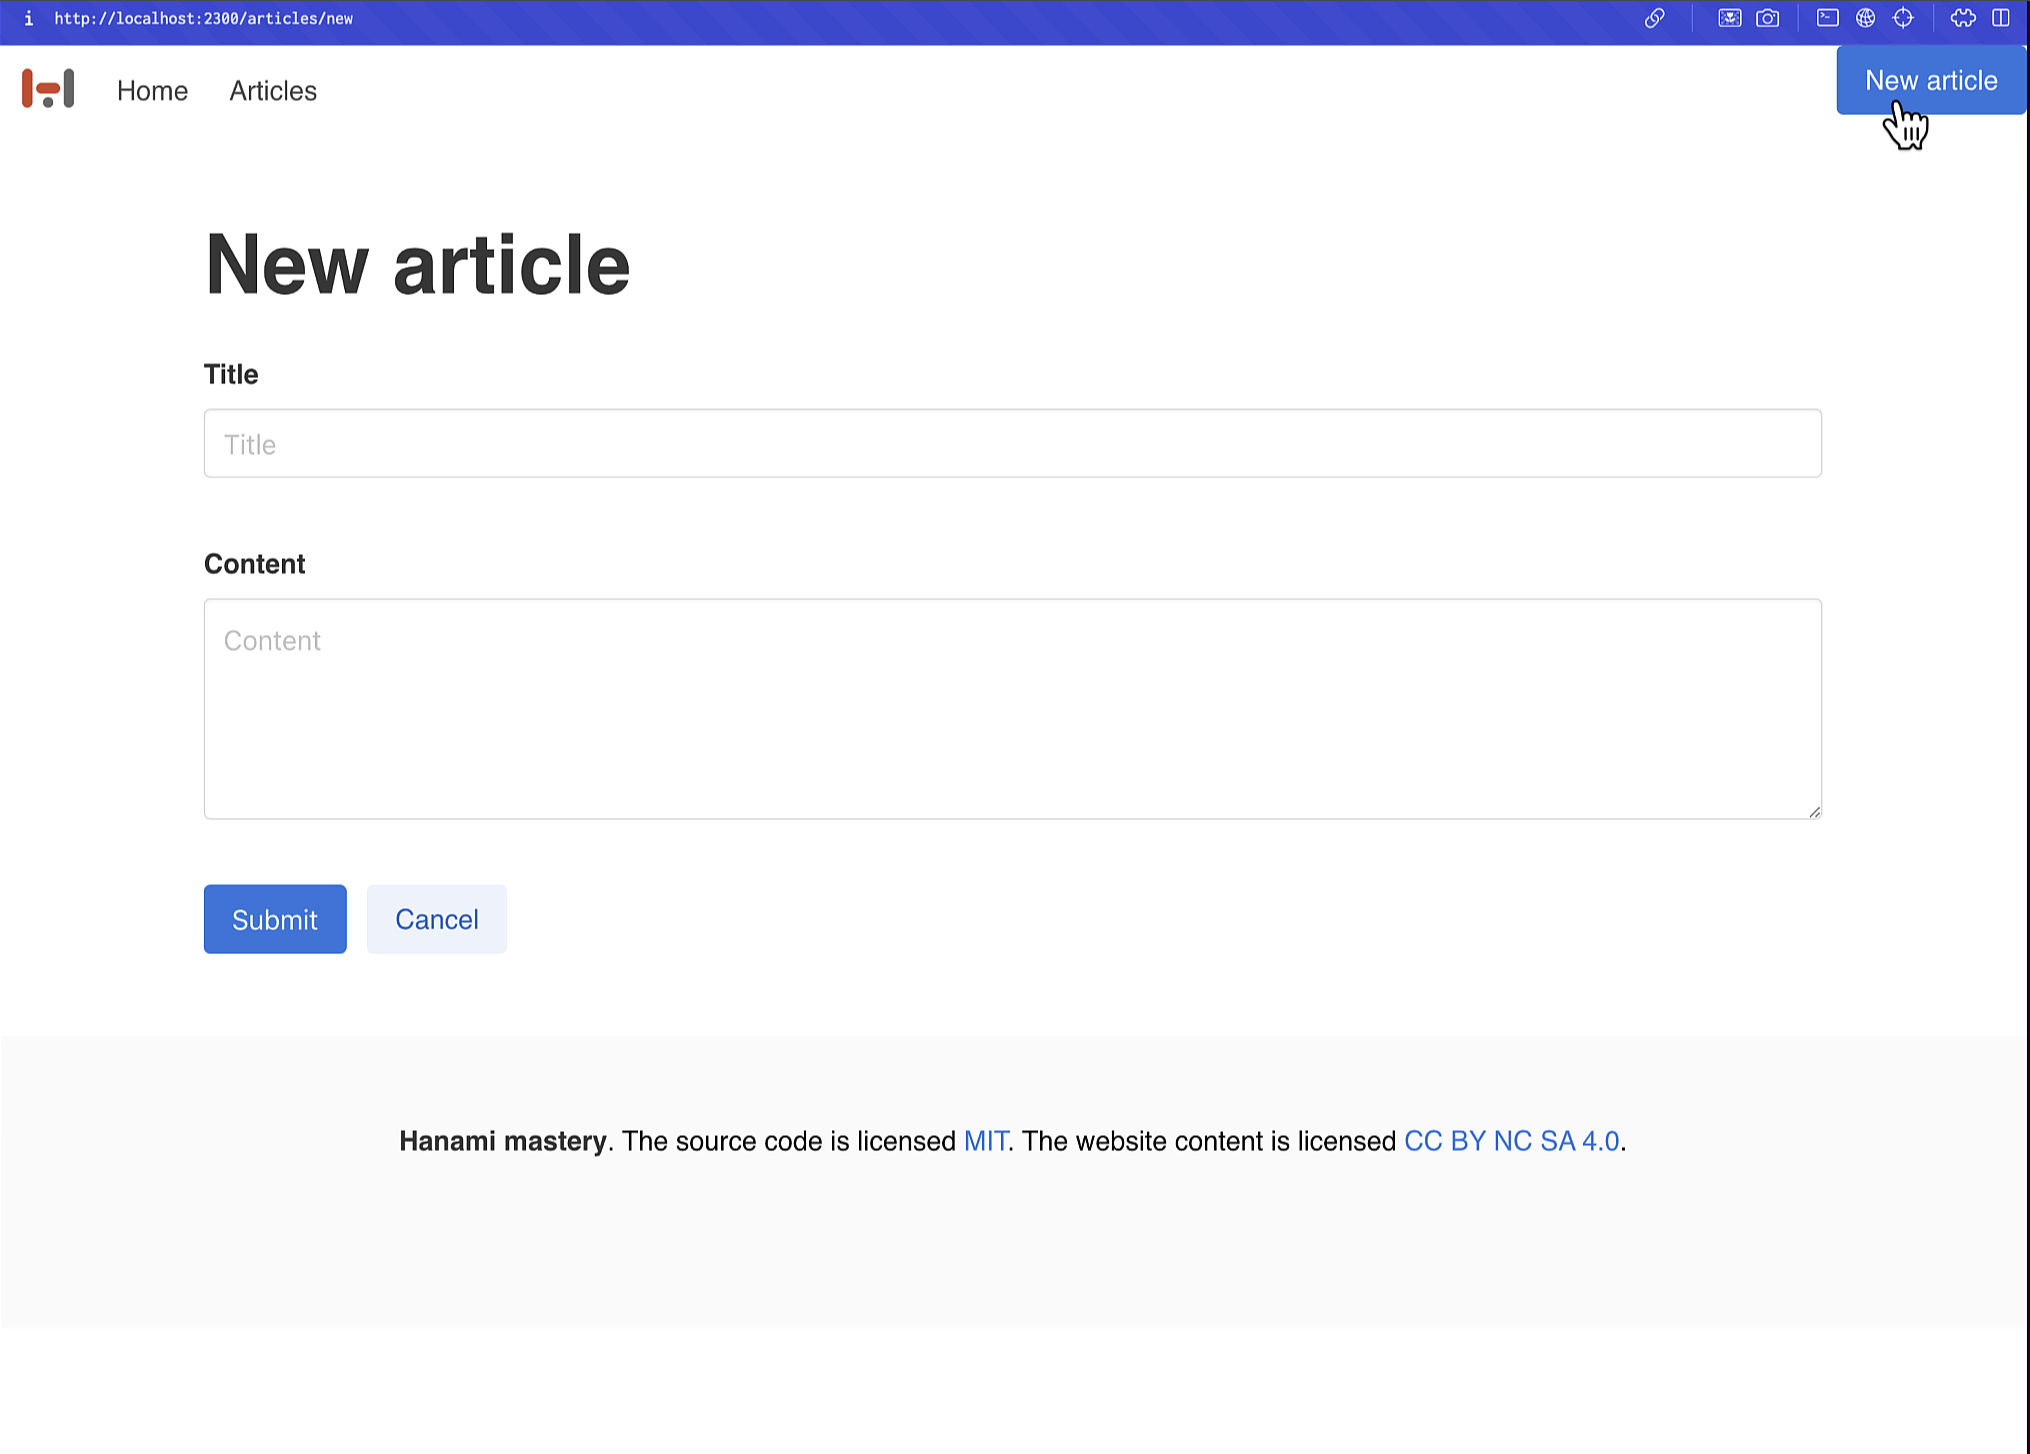 New article form
Request handling
In the action file, I'll start from validating the object. I want the form to have an article root key, and inside be title attribute, coercible to string and present, as well as the content, with the same rules applied.
# app/actions/articles/create.rb

params do
  required(:article).schema do
    required(:title).filled(:string)
    required(:content).filled(:string)
  end
end
With this, I can halt the request processing in case request is invalid, and either render the error page, or render the
form again, passing the error messages to the view.I have multiple view-related videos recorded already, so if you want, you can easily access them by clicking the view tag under any of the Hanami Mastery episode titles.
With that you can quickly learn how to create advanced forms, that dynamically show error messages and success notifications.
For now I'll just halt the response, and if it's successful, create the article with the :article attributes. Finally, when all that is successful, redirect to the articles listing.
# app/actions/articles/create.rb

include Deps[repo: "repos.article_repo"]

def handle(request, response)
  halt 422 unless request.params.valid?

  repo.create(request.params[:article])
  response.redirect(routes.path(:articles))
end
I'll need yet include the article_repository dependency and now I can try it out.
The server returns an error with undefined method params for the Create action. This happens, because I tried to call params directly - as you may see often in the rails controllers - but in Hanami apps, params are called on request, while method like render or redirect, are called on response object.
Worth noticing if you come from Rails ecosystem! This kind of error can be very familiar to you.
Now I have a fully functional article creation in my blog application. Great!
Let me add the last feature for today then and remove some of our items from the list!
Deleting articles.
To remove articles, I'll generate a new action, but this time, with the --skip-view flag, which prevents hanami from creating both view and template files.
bundle exec hanami g action articles.destroy --skip-view
As you can see, only a single action file had been added to the folder, and the routes file had been updated by adding a new delete route.
# config/routes.rb
delete "/articles/:id", to: "articles.destroy", as: :destroy_article
Let me update the action file now to handle the request. I'll again need the repository dependency to be injected, so let me add this now, but the content of the file will be pretty much the same as the show action. Validating ID, then halting in case of incorrect params - so I'll copy it over to save some time.
Now at the end I'll delete the row based on the passed ID, and redirect to the articles listing as we did before.
# app/actions/articles/destroy.rb

module HanamiMastery
  module Actions
    module Articles
      class Destroy < HanamiMastery::Action
        include Deps[repo: 'repos.article_repo']

        params do
          required(:id).filled(:integer)
        end

        def handle(request, response)
          halt 404 unless request.params.valid?

          repo.delete(request.params[:id])
          response.redirect(routes.path(:articles))
        end
      end
    end
  end
end
That's all here, and what had been left, is generating links to these endpoints on the articles' listing page. Here in the index template I have two buttons, for edit and destroy actions. Because destroy route accepts HTTP method :delete, the usual link will not work. You may either write a JS snippet to make it functional, or use the form helper to achieve the same goal.
I'll use the second approach, which does not require any javascript and will be sufficient for my current needs.
I want to replace the link_to helper with the form's submit button, and wrap this around with form_for helper. This will send the delete HTTP request under the articles/:id route to remove my article.
Now in the routes file, I'll add the alias to my route, and that should be all!
I have now an application, that can list, preview, create, and delete articles, with full DB integration and using Bulma CSS framework to look great!
Homework
You may see, that the last feature, updating the article, I've left unifinished, and that's on purpose - feel free to treat it as homework!
Summary
I am amazed by the progress that Hanami 2.2 show, and how well ROM classes are integrated in this version. There are no issues whatsoever, and everything I'd need to build advanced web applications is already in place.
The plain view generators may require some love in the near future, but this quality of life features are not as important, as when more advanced apps are being written, generators are becoming less useful, and the AI autocompletion tools like copilot take the lead.
Now we have finally the complete, full-featured framework and I cannot wait to play with it and write some serious Hanami apps for real!
Consider subscribing?
I hope you've enjoyed this episode, and if you want to see more content in this fashion, Subscribe to my YT channel, Newsletter and follow me on Twitter!
Thanks
Recent sponsors:
Cover photo
Consider support?
By helping me with a few dollars per month creating this content, you are helping the open-source developers and maintainers to create amazing software for you!
And remember, if you want to support my work even without money involved, the best you can do is to like, share and comment on my episodes and discussions threads. Help me add value to the Open-Source community!
If you know other great gems you wish me to talk about, leave a comment with #suggestion, and I'll gladly cover them in the future episodes!
Add your suggestion to our discussion panel!
I'll gladly cover them in the future episodes! Thank you!